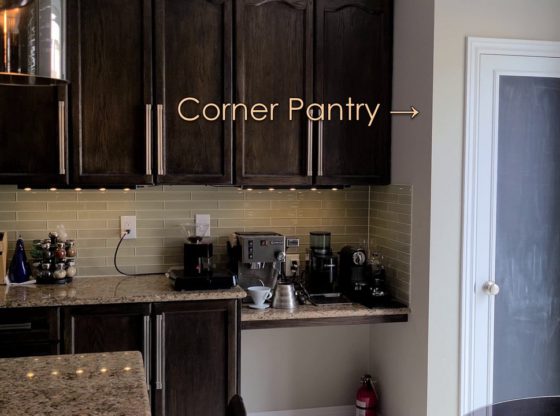
Tackling a home renovation project on your own can be both rewarding and cost-effective, especially when you’re prepared to handle tasks that might initially seem like a professional job. In this DIY kitchen renovation guide, the focus is on removing a non-load bearing wall, specifically a corner pantry, to make room for relocating a fridge. The first step is determining whether the wall is load-bearing or not. By examining the direction of the joists in the basement and verifying that there are no structural supports above, the DIYer can safely confirm that the wall can be removed without compromising the integrity of the home. Understanding these critical structural elements ensures the safety of the project and avoids costly mistakes.


Once the wall is determined to be non-load bearing, the demolition phase begins. The pantry door and shelves are removed first, followed by the granite countertop. Then, the wall’s trim is pried open, and an inspection camera is used to identify hidden elements, such as HVAC ducts and PEX water pipes, running inside the wall. These findings add complexity to the project, as the plumbing and ducts will need to be relocated to accommodate the new kitchen layout. The video offers step-by-step instructions on how to properly disconnect and move these systems, ensuring the space is ready for the next phase of the renovation. Removing tiles and preparing the subfloor is also necessary to make room for the relocation of plumbing and air ducts.


As the demolition progresses, the project shifts to more detailed technical work. To relocate the plumbing and HVAC, the DIYer drills precise holes through the joists and subfloor, ensuring everything is in line with building codes. The importance of using the right tools and materials is emphasized—especially when working with PEX pipes and air ducts. For example, the video recommends using a PEX crimping tool over a SharkBite fitting for more secure, long-lasting connections. Additionally, the proper installation of the new air duct system, including sealing joints with aluminum foil tape, ensures the HVAC system will operate efficiently. In this part of the project, the importance of taking your time to measure accurately and double-checking every step is underscored.


The final phase of the renovation involves framing, drywall installation, and finishing touches. After installing the necessary plumbing and ductwork, the DIYer constructs a bulkhead to enclose the new systems, ensuring the space looks clean and organized. This involves carefully measuring and cutting lumber for support, installing drywall, and paying attention to details like leveling the drywall for a professional finish. For smooth seams, the video recommends using self-adhesive mesh tape instead of paper tape, which can cause headaches for DIYers. The drywall is then mudded and sanded, with tips on how to achieve a smooth, flawless finish. Throughout the video, the emphasis is on using the right tools, working methodically, and taking pride in each step of the renovation process to ensure a successful outcome that looks professionally done.


Disclaimer: I am NOT affiliated with any of these products, companies or people, I just want to share my experience as a serious DIYer and try to help other DIY people out there.
This is the complete video. If you think it’s helpful, click here to SUBSCRIBE to my YouTube channel
