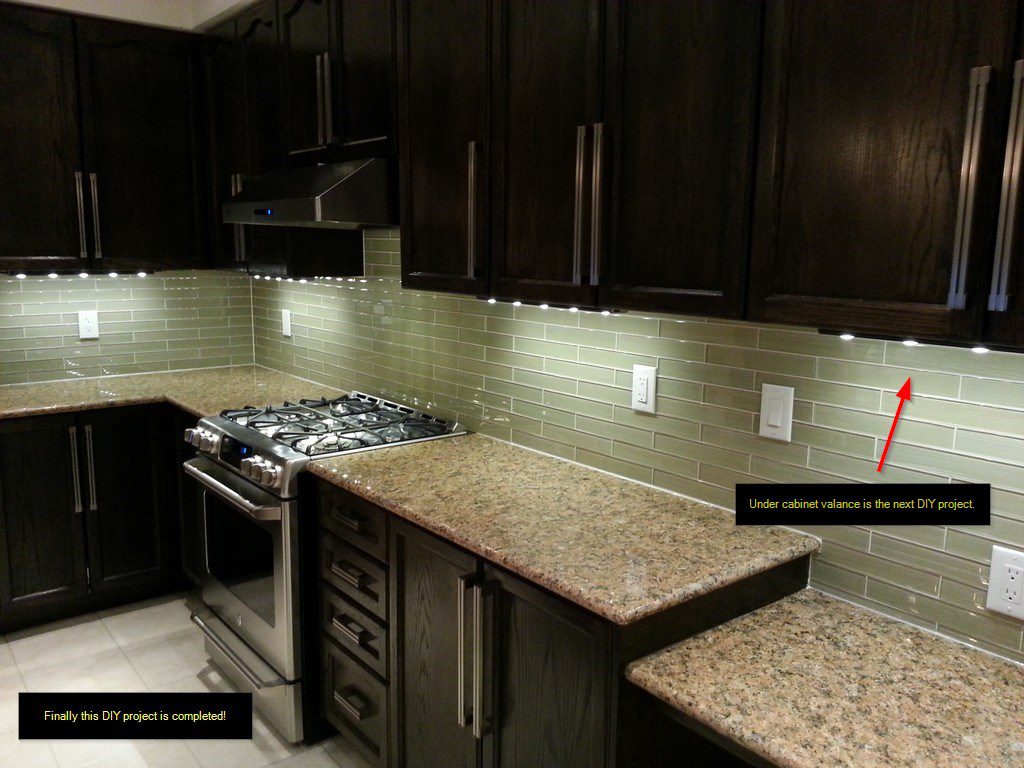
This DIY project took 2 months for me to complete (one person, mostly worked on weekends and limited statutory holidays). During this renovation period, we could not even cook and ate out every single night. Finally, this is done and the result looks stunning! Just in time to hand the kitchen back to my wife on Valentine’s Day.
The following is the summary of tasks. For technical details I have added the short description to each photo. Enjoy!
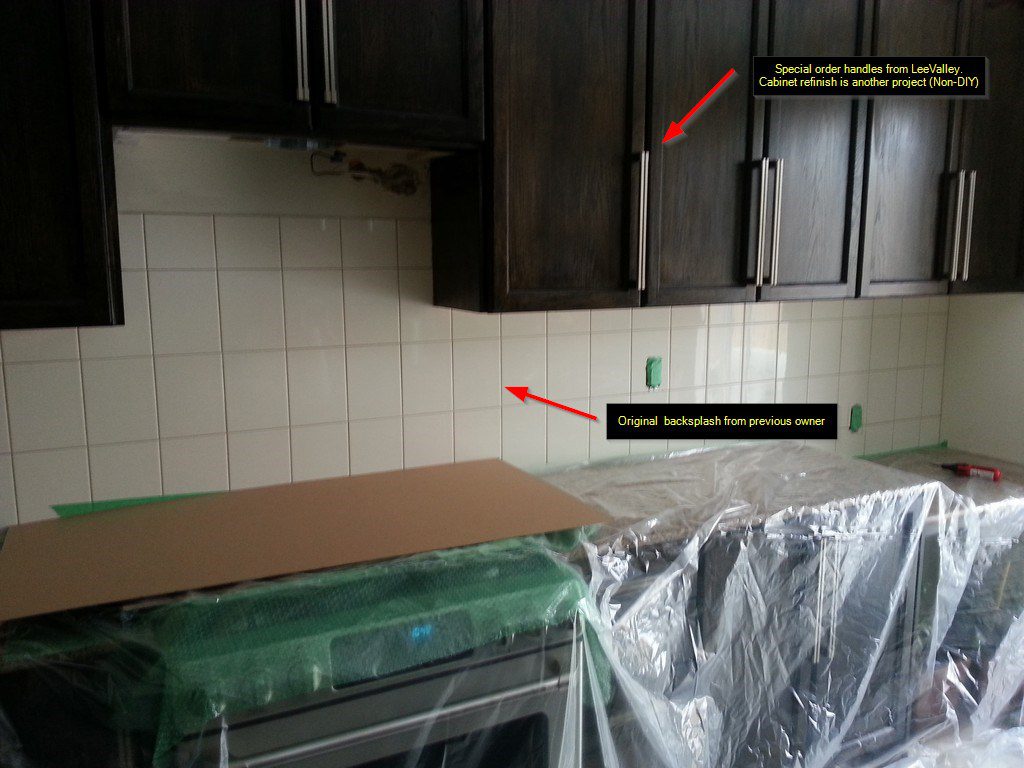
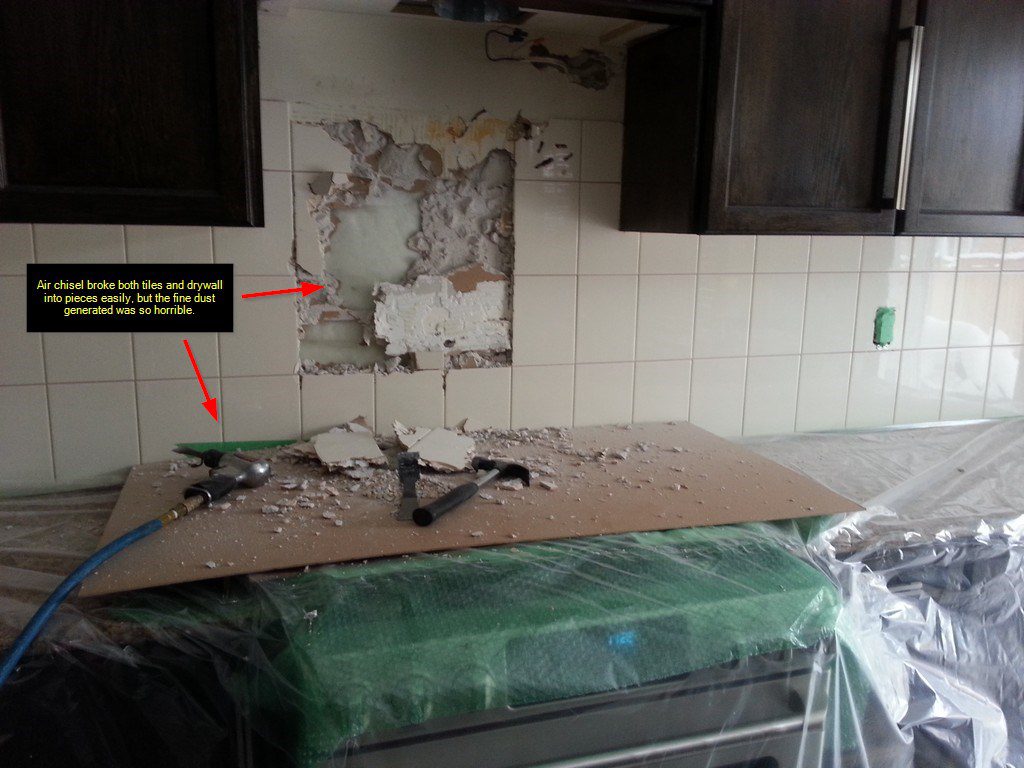
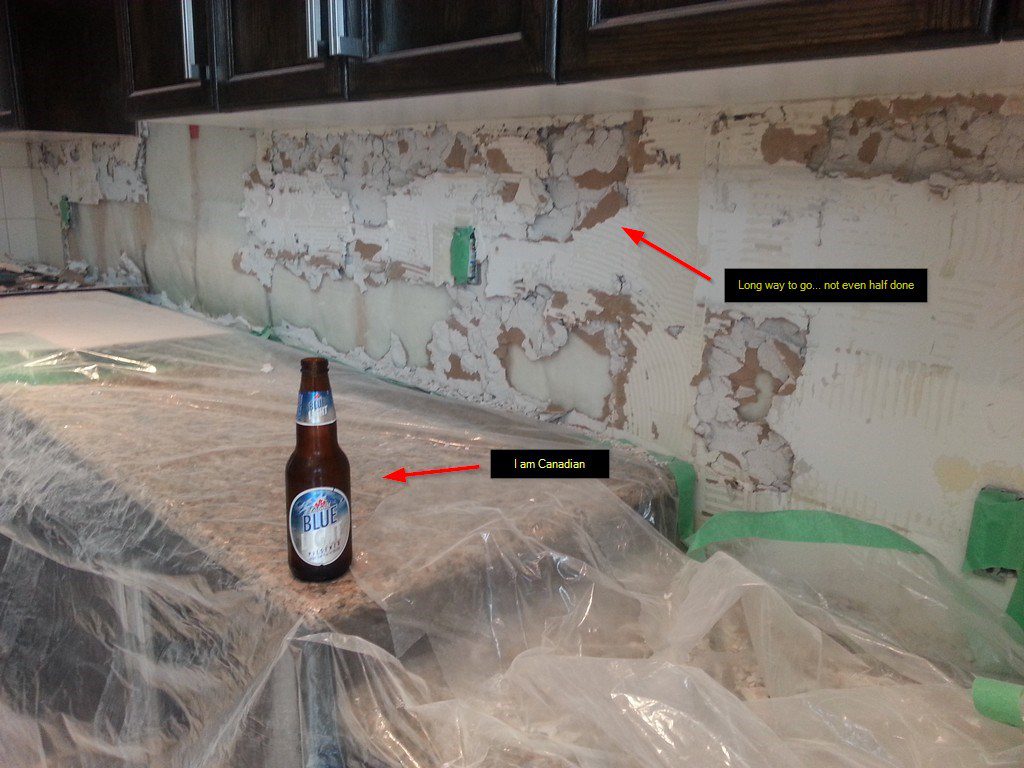
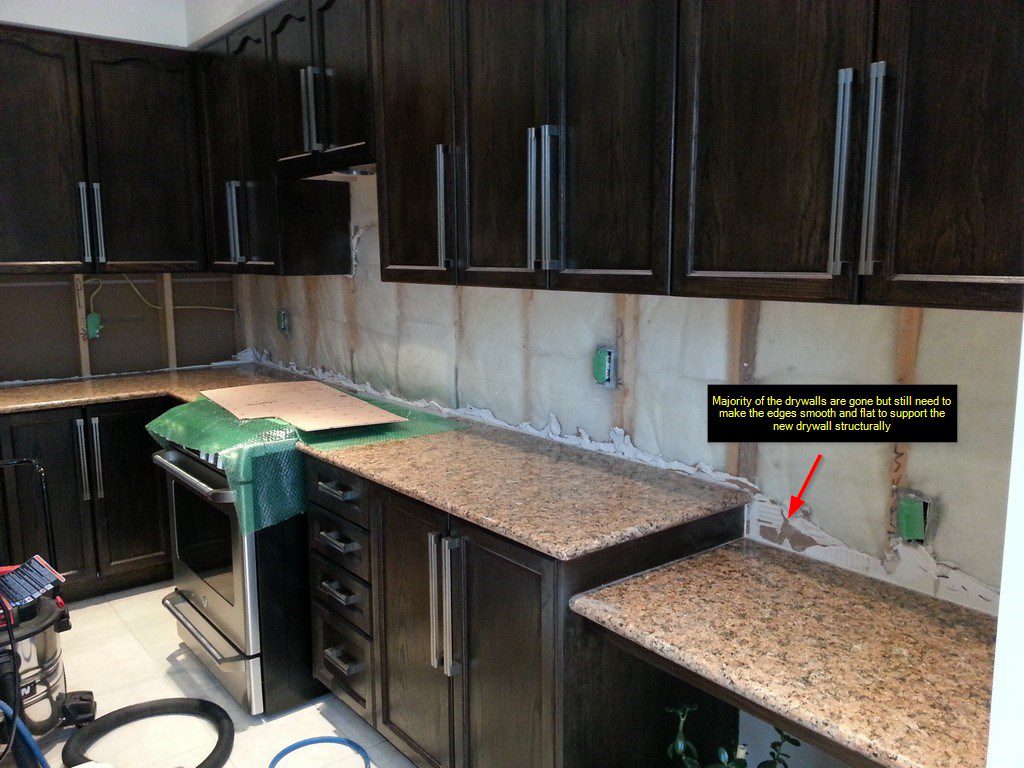
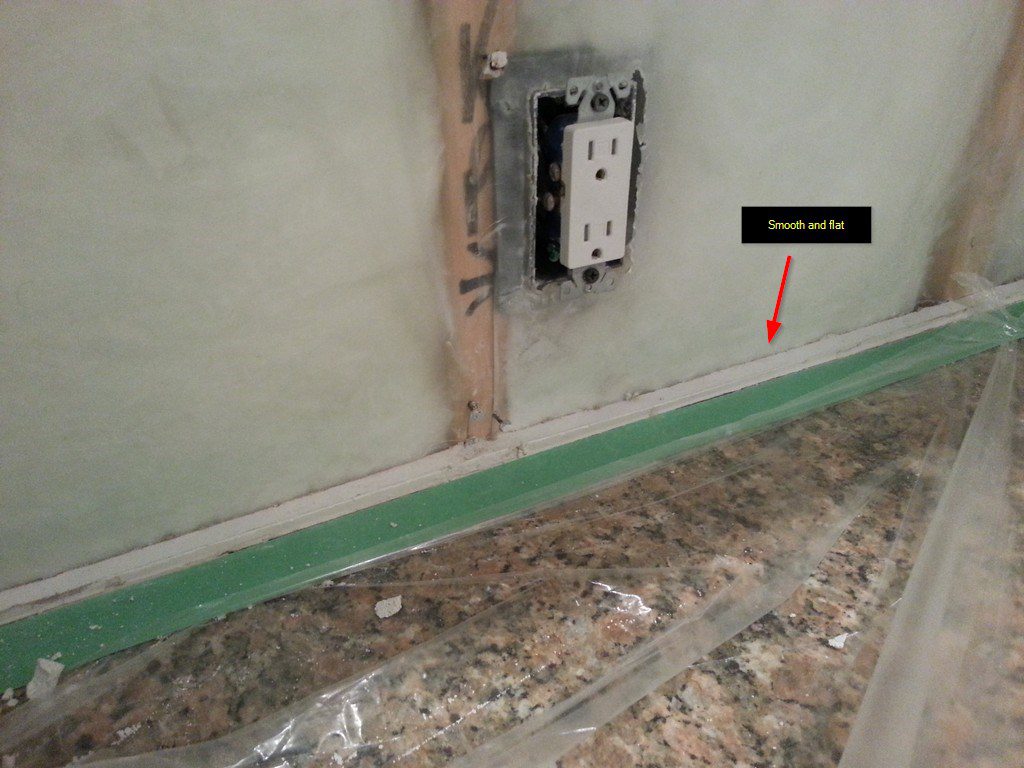
- Removing existing tiles and drywall
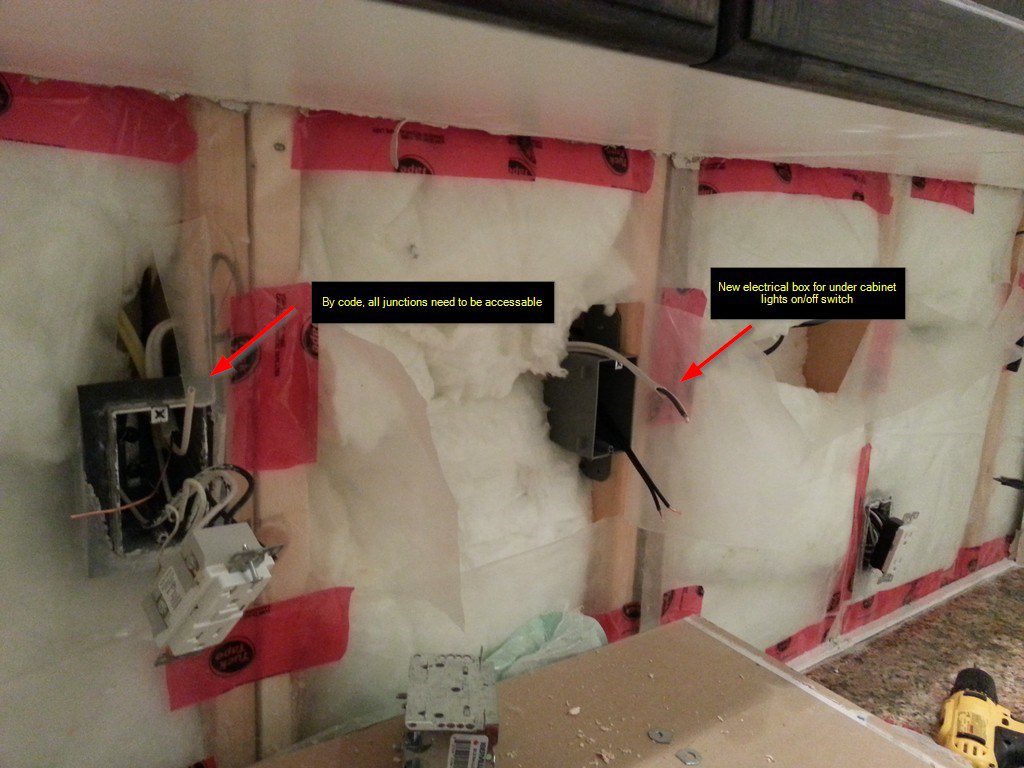
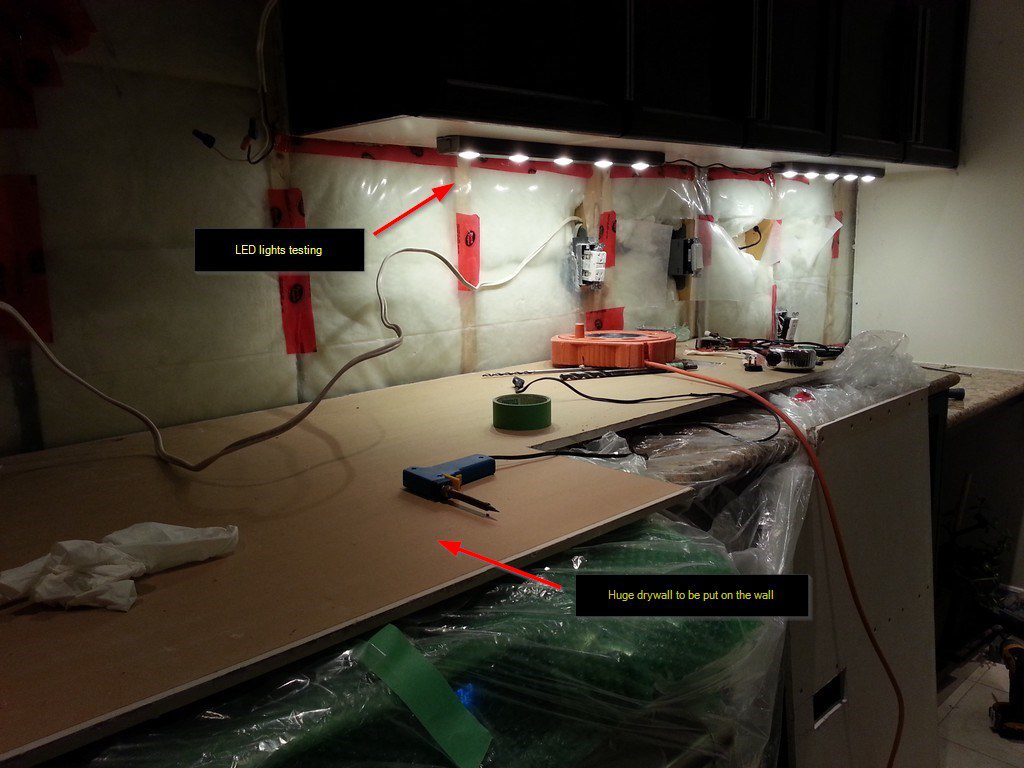
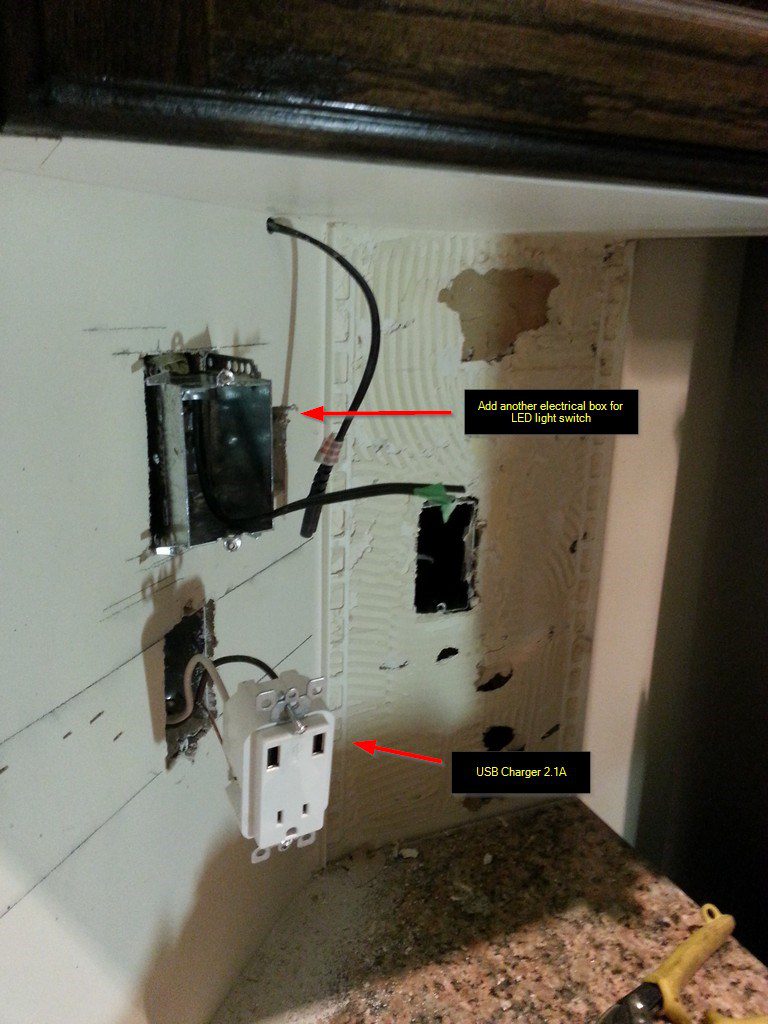
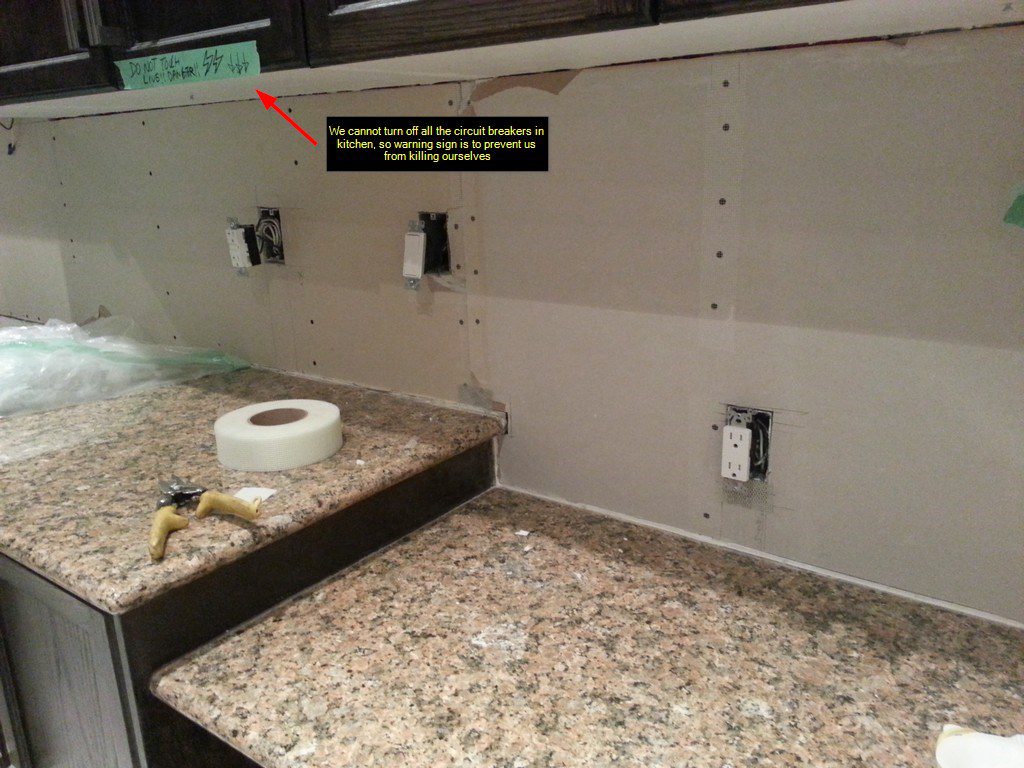
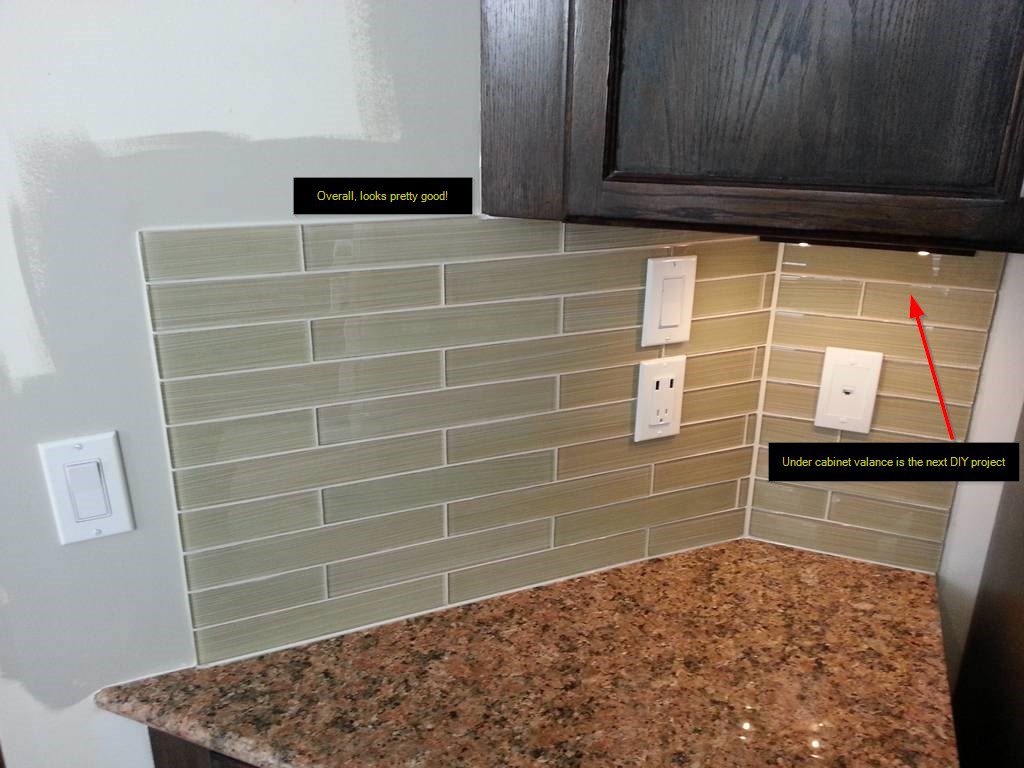
- Electrical work for under cabinet lights
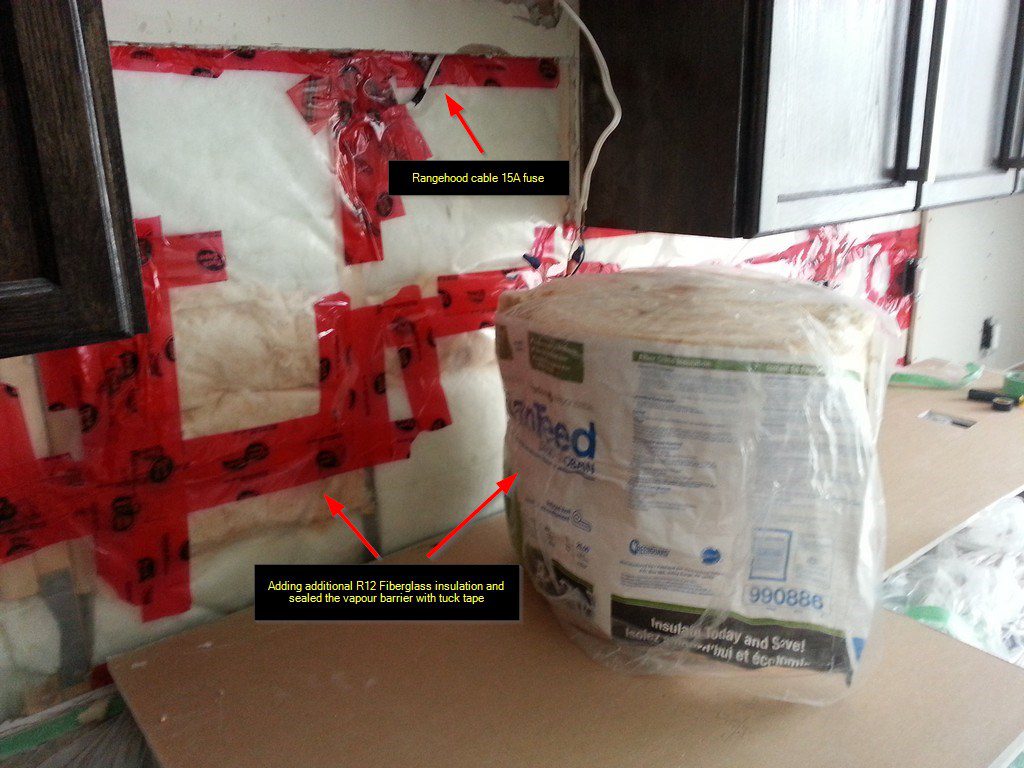
- Vapour barrier and insulation
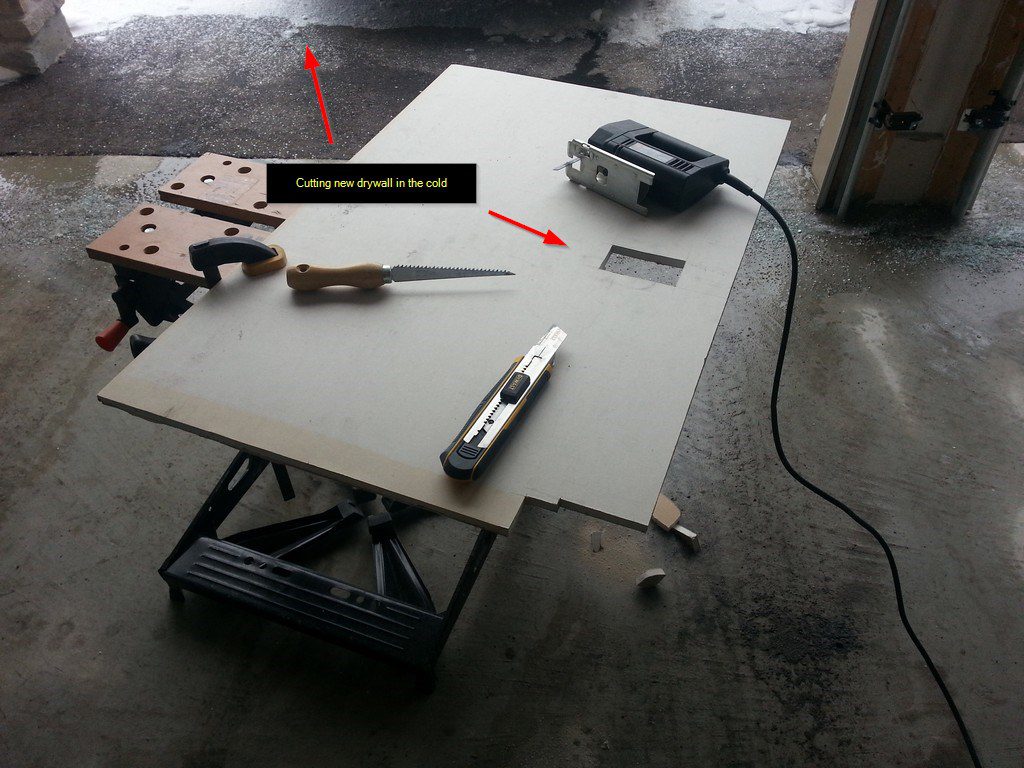
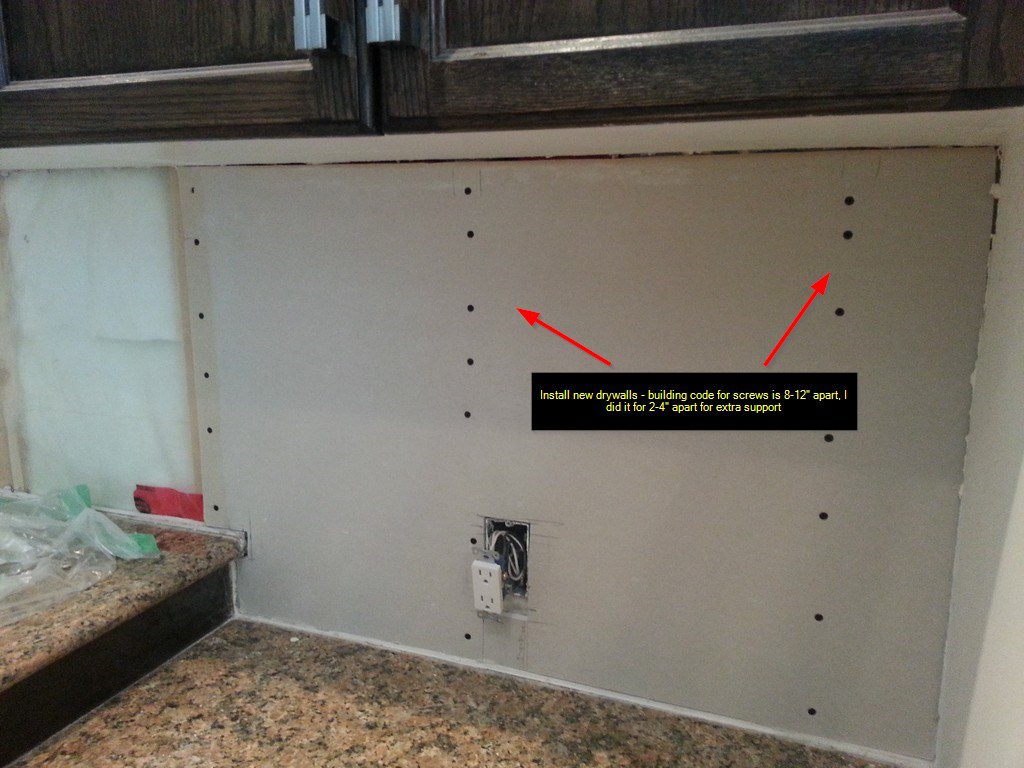
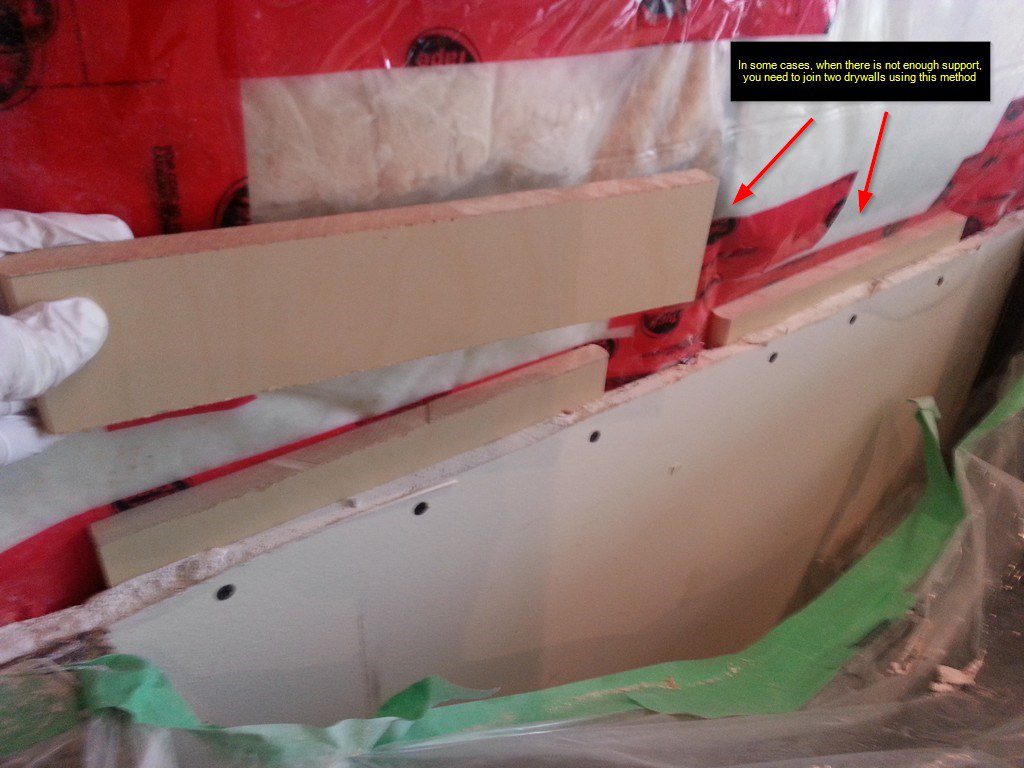
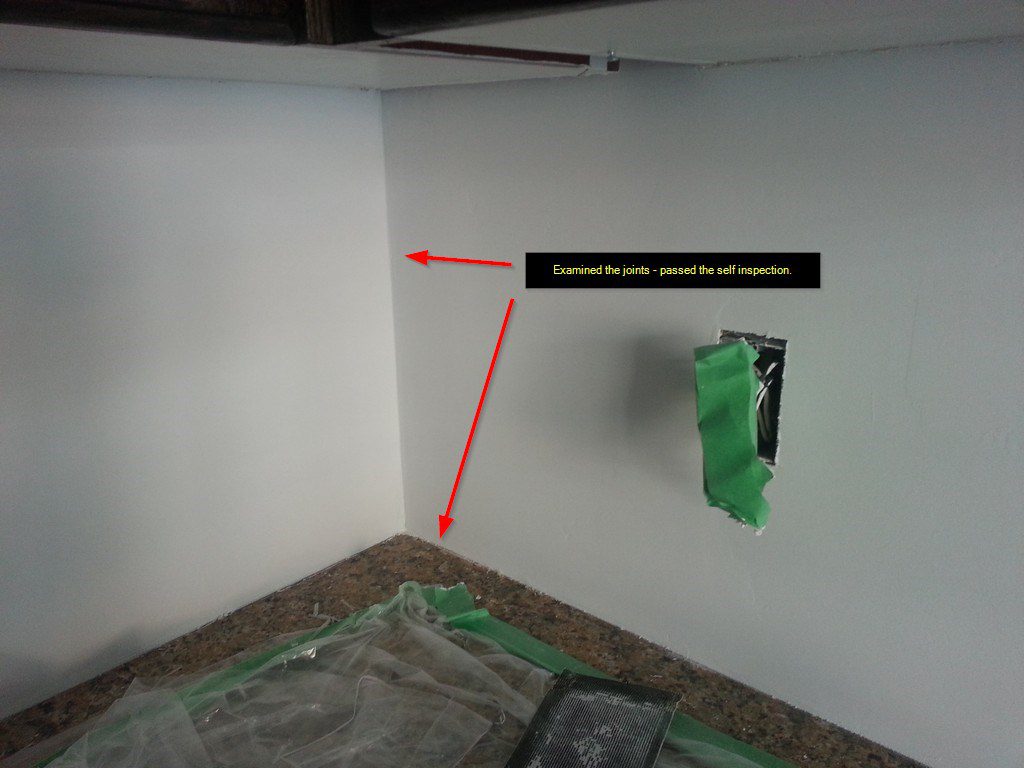
- Cut and installing new drywall
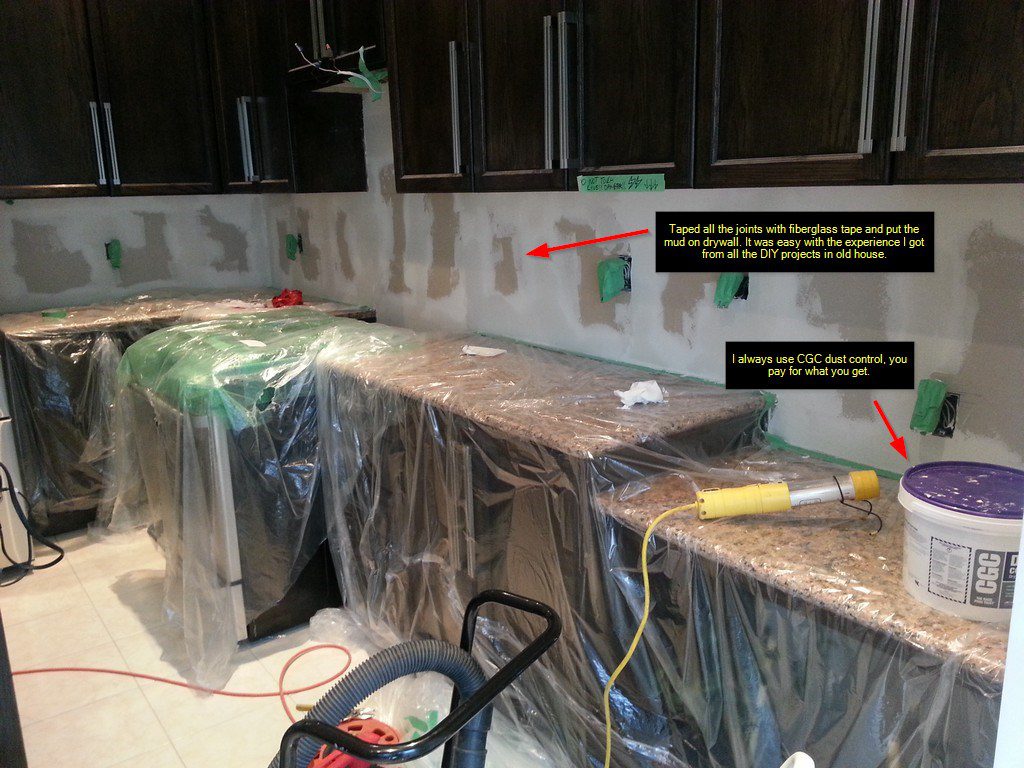
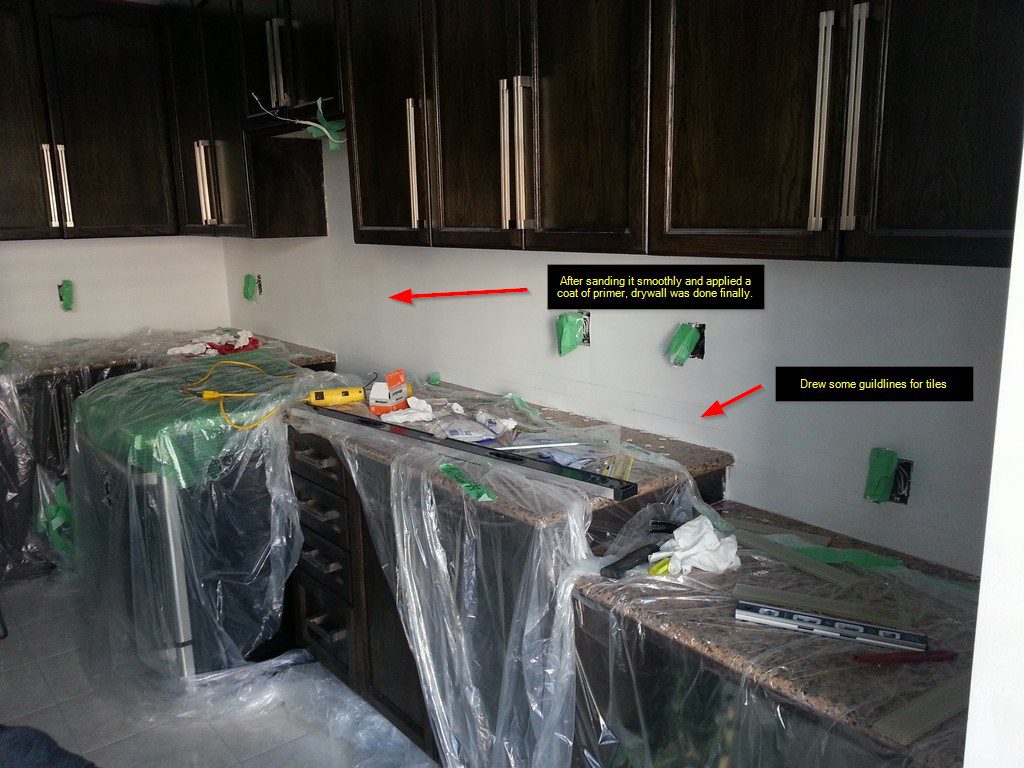
- Drywall mudding + sanding + Primer
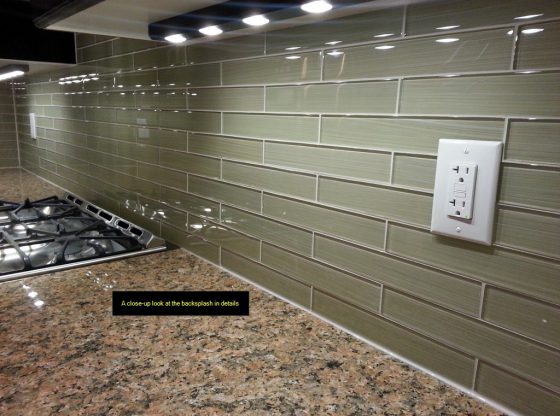
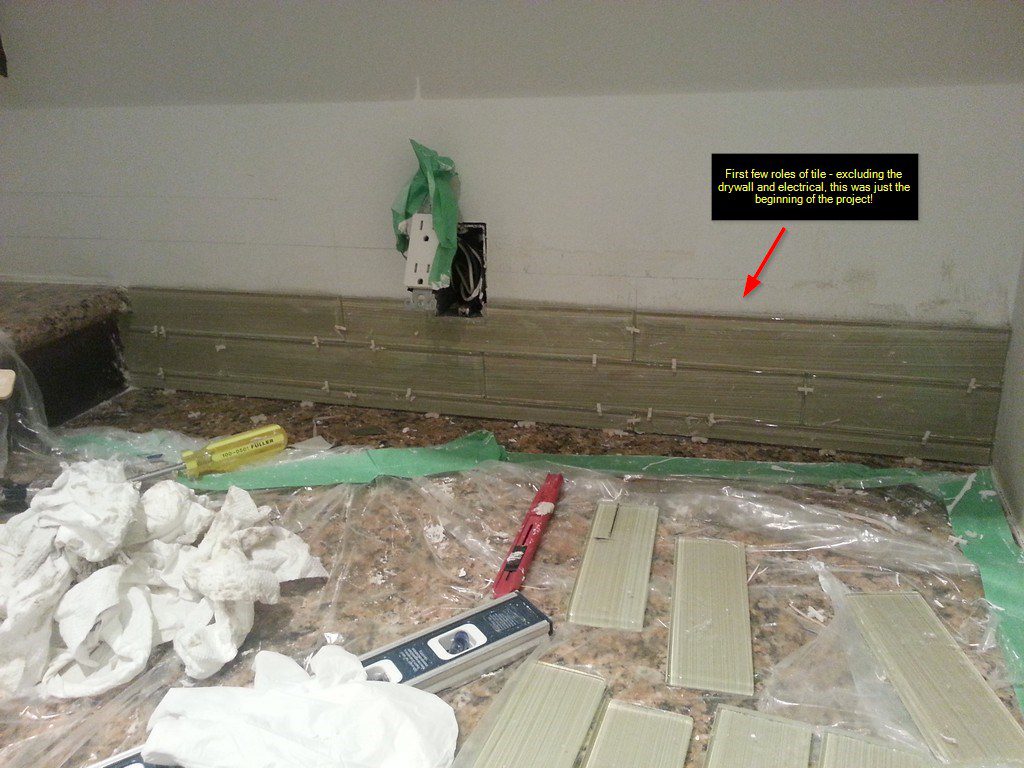
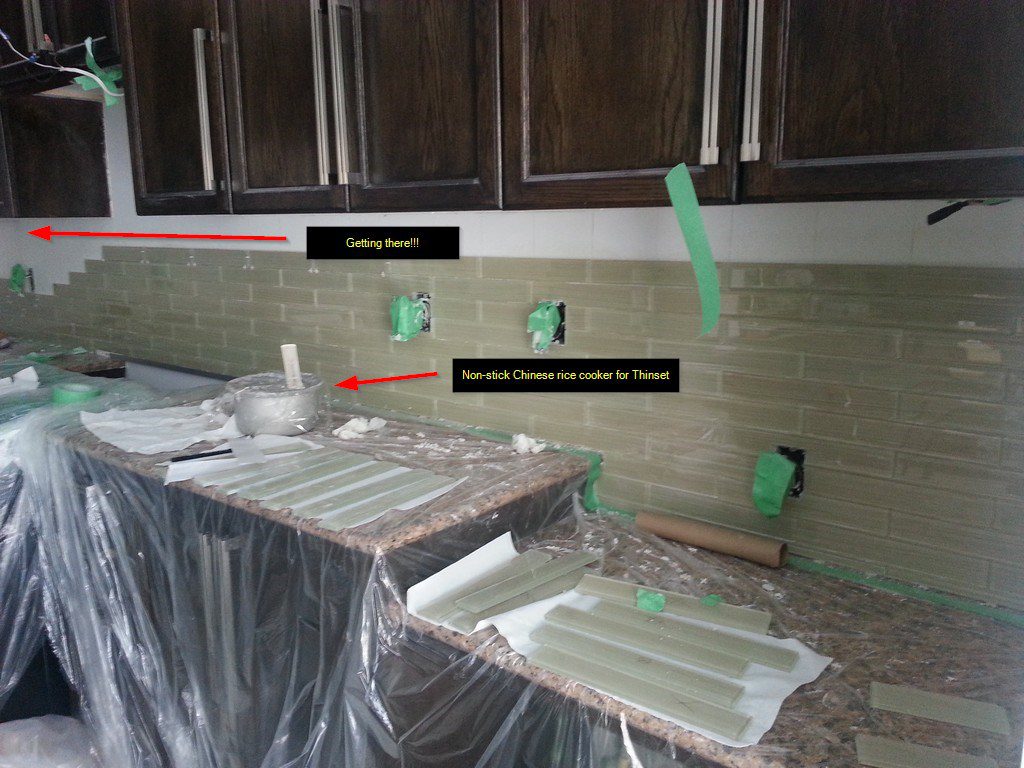
- Tile installation (Cutting tiles + Thinset)
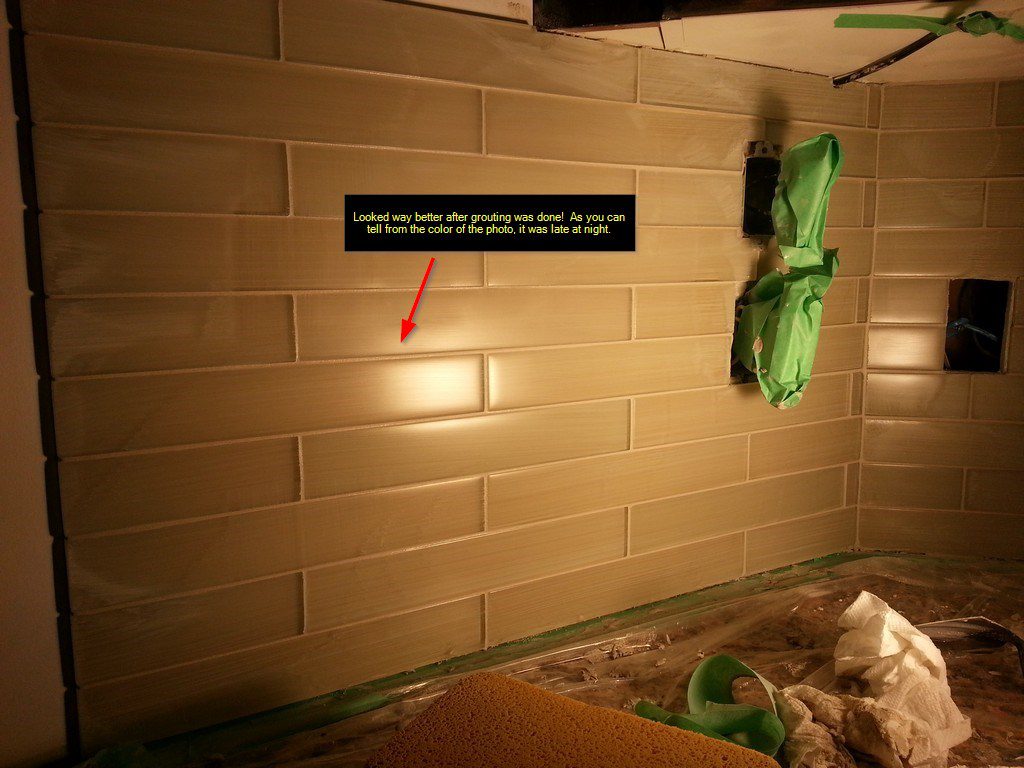
- Tile Grouting
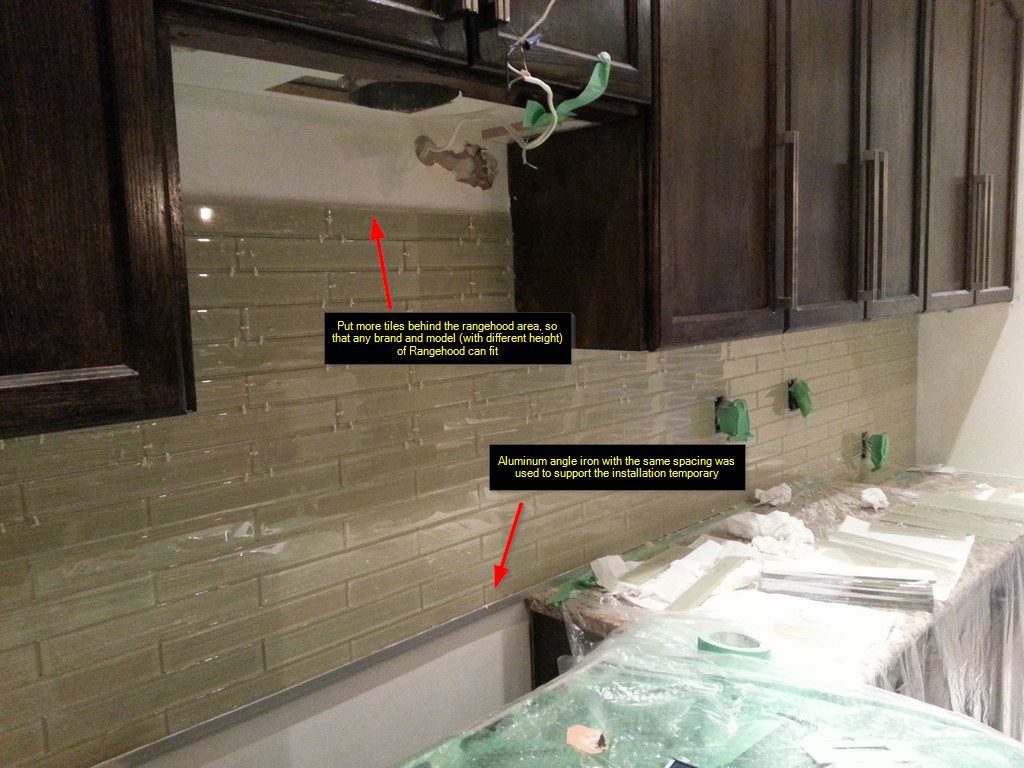
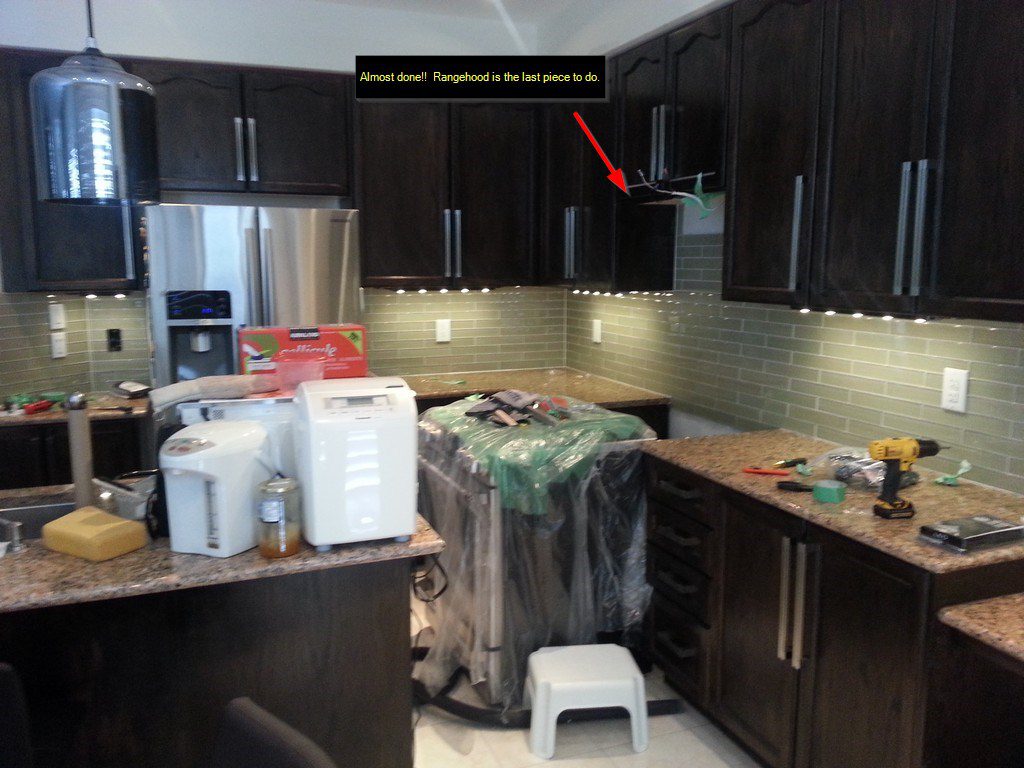
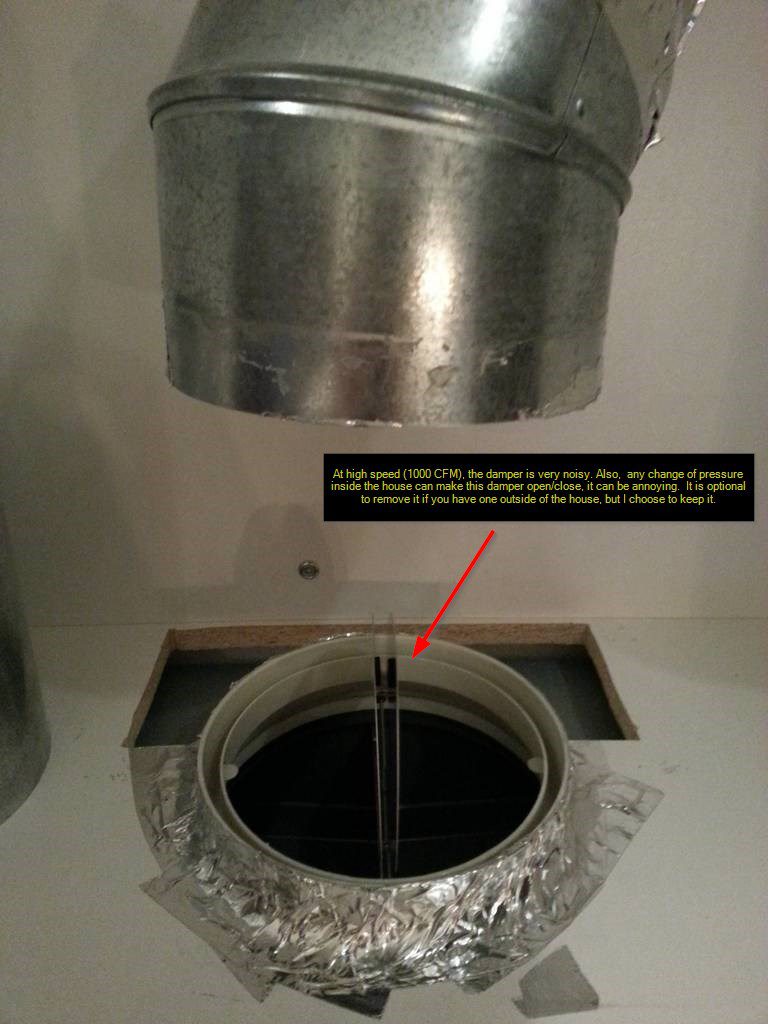
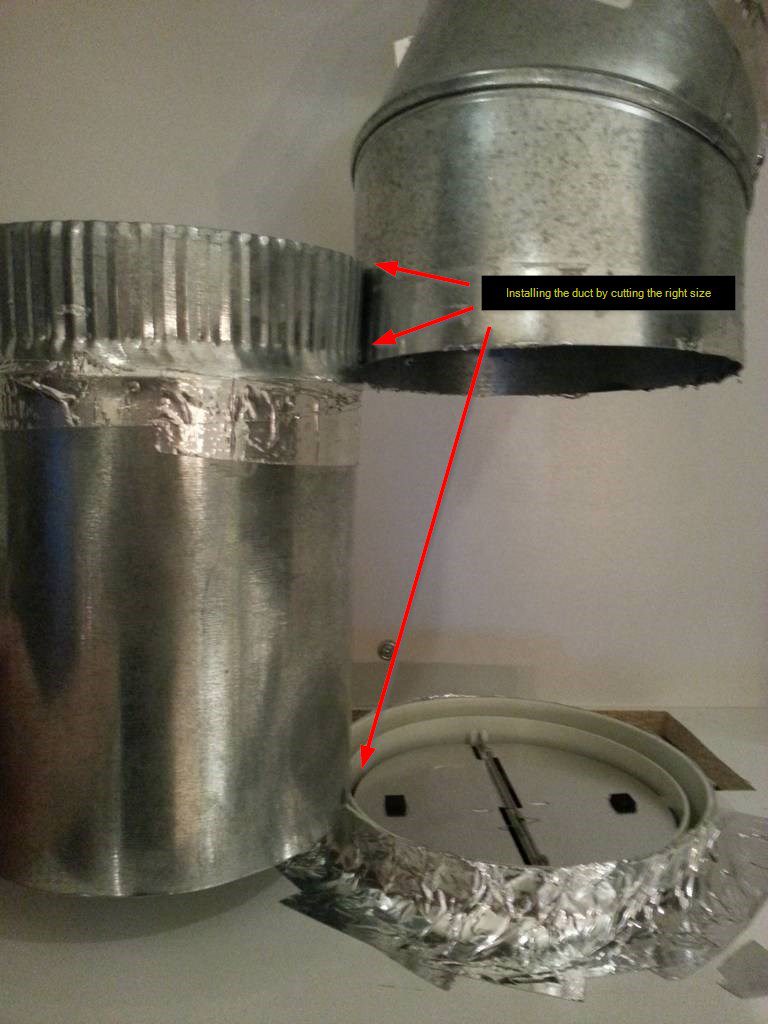
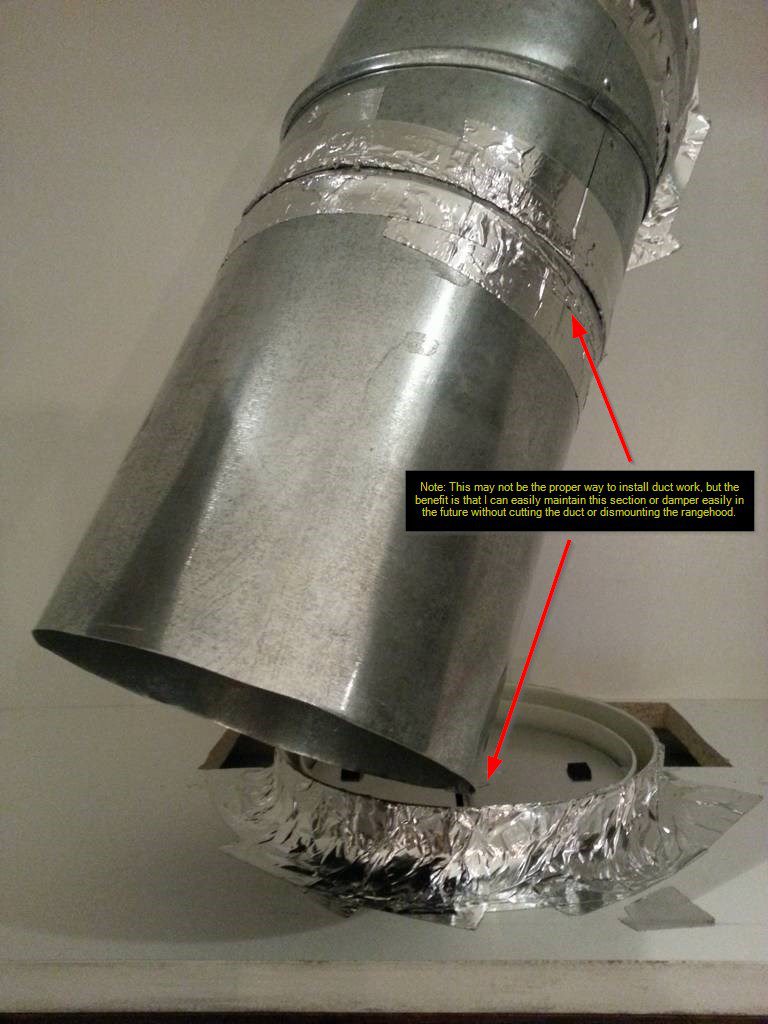
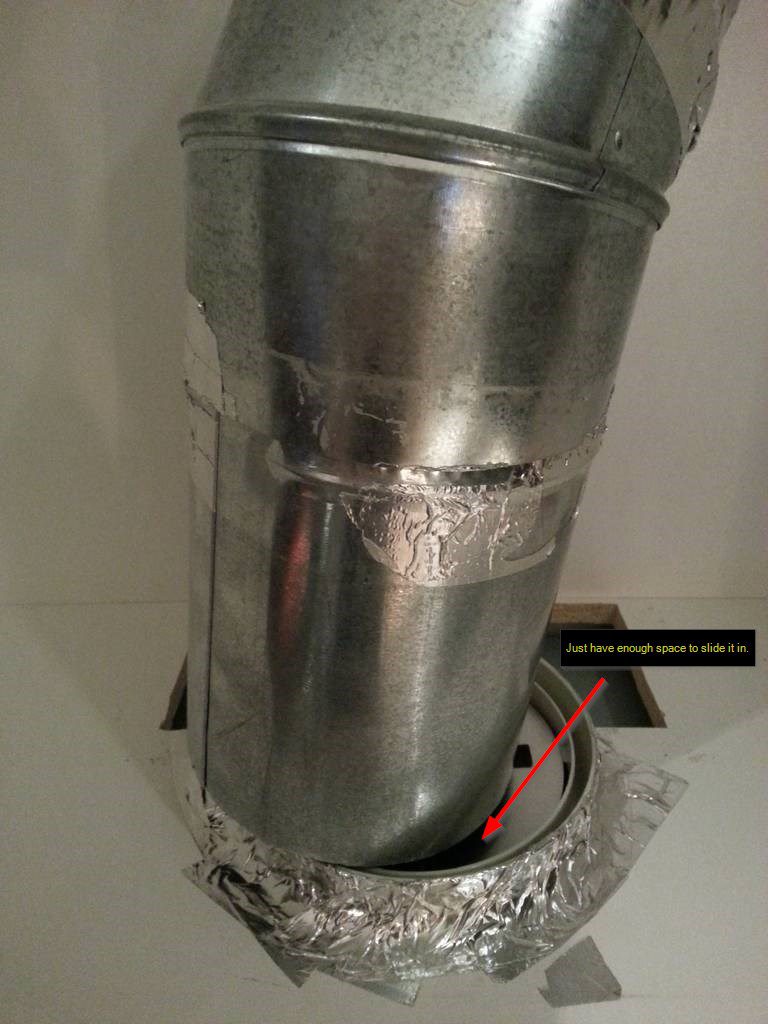
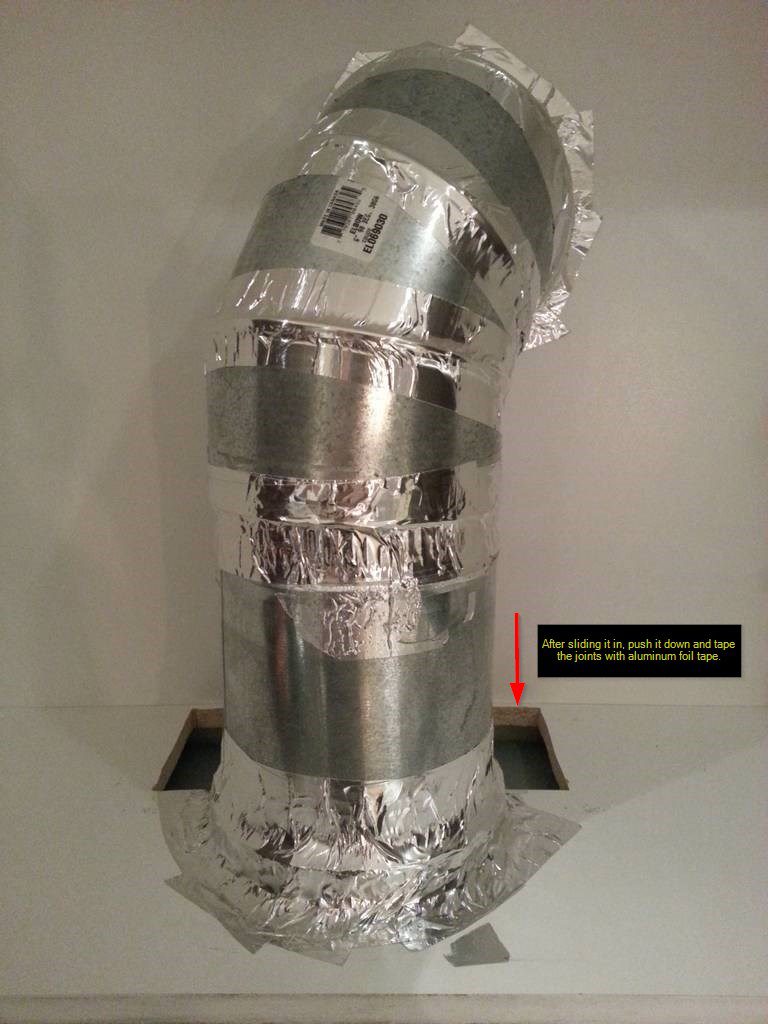
- Rangehood installation
Why DIY instead of hiring professional?
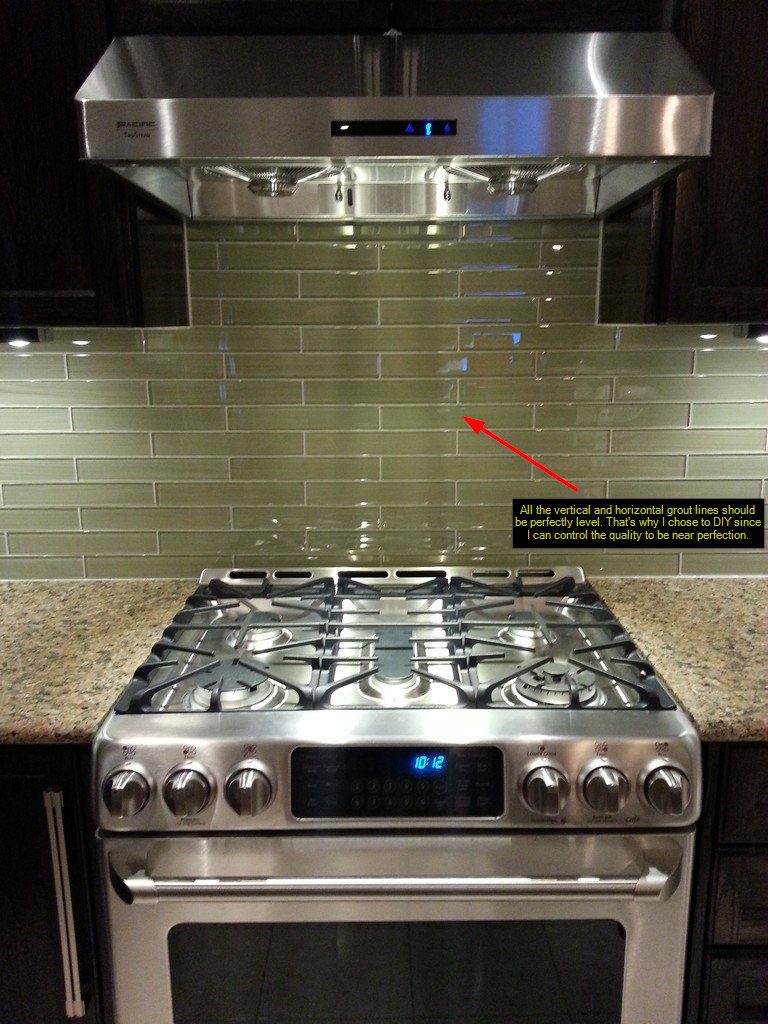
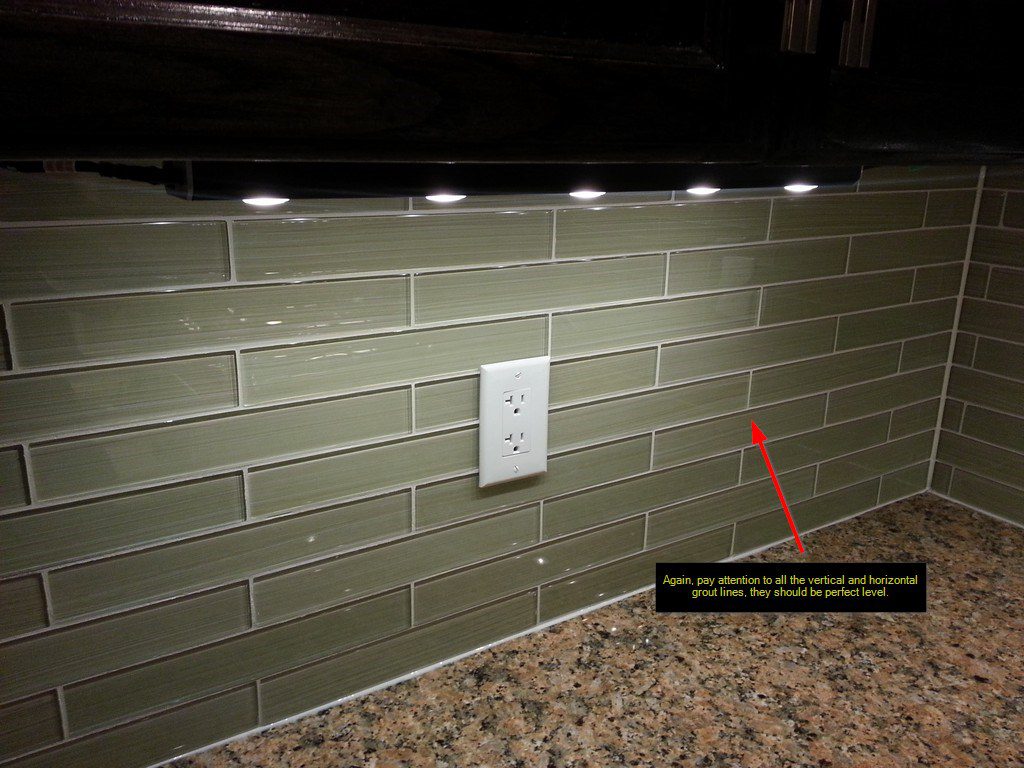
A lot of friends asked us why DIY instead of hiring professional? Simple, next time if you go to Starbucks, restaurants, stores in the mall, HD/Lowes kitchen show room or any place that has backsplash (specifically look for glass tiles), pay attention to the vertical and horizontal grout lines and ask yourself if they are perfectly level. Go to YouTube, search for “glass tile installation” and pause some of those videos and look carefully on the grout lines, you will see what I mean. Of course, there are good contractors out there, but they are very hard to find.


Additional DIY Tips:
I am not a professional by trade, but I believe anyone should be able to get the same high quality result if you have common sense, I did extensive research before starting a project. Here are some tips for DIY-ers, also these are some important points to consider if you are to hire a contractor to do the job. Hope this helps.
- Removing tiles vs Replacing drywall: You don’t have to replace drywall like mine, you can pry the old tiles instead. But I wanted a perfectly smooth surface, and I had to run the wires behind the walls for under cabinet lights, that’s why I decided to replace the drywall.
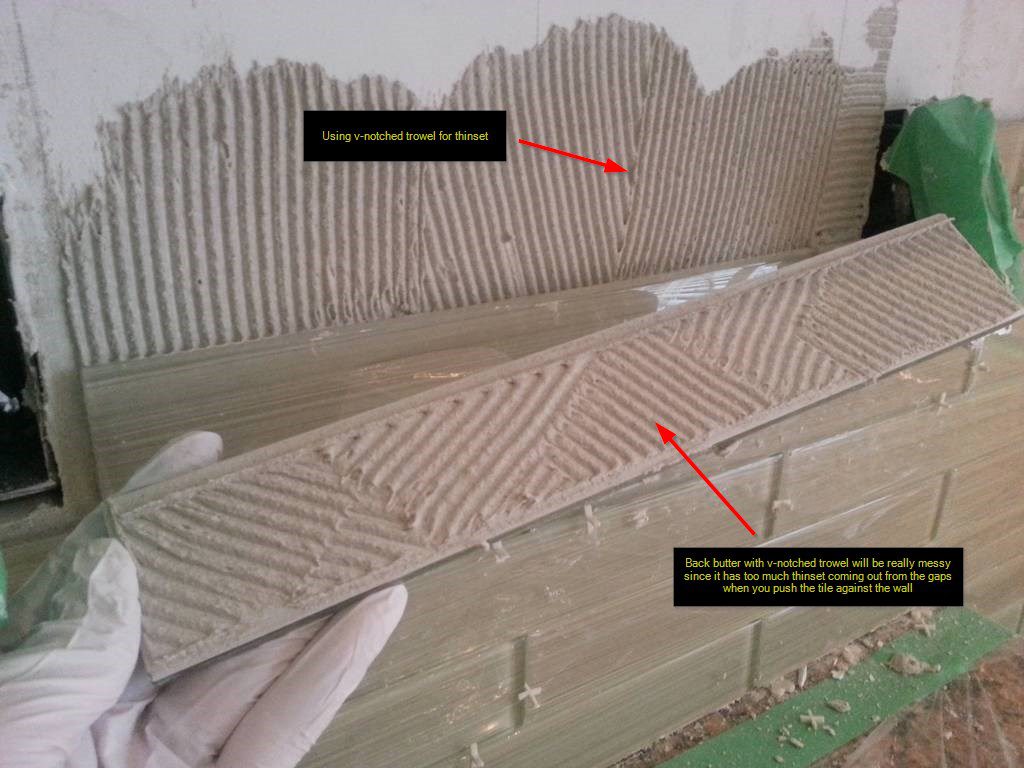
- Thinset: It is extremely messy because of the sand, it takes time to mix and clean up. But thinset is recommended for glass tile over pre-mixed glue (mastic). Google this topic for details. If you are not using glass tile, avoid thinset and use mastic glue if possible to save time, because they are pre-mixed.
- Glass tile: Glass is extremely sharp, I cut myself several times. I recommend you cut the tiles in the garage, not inside the house. Any small piece of glass can scratch your existing floor.
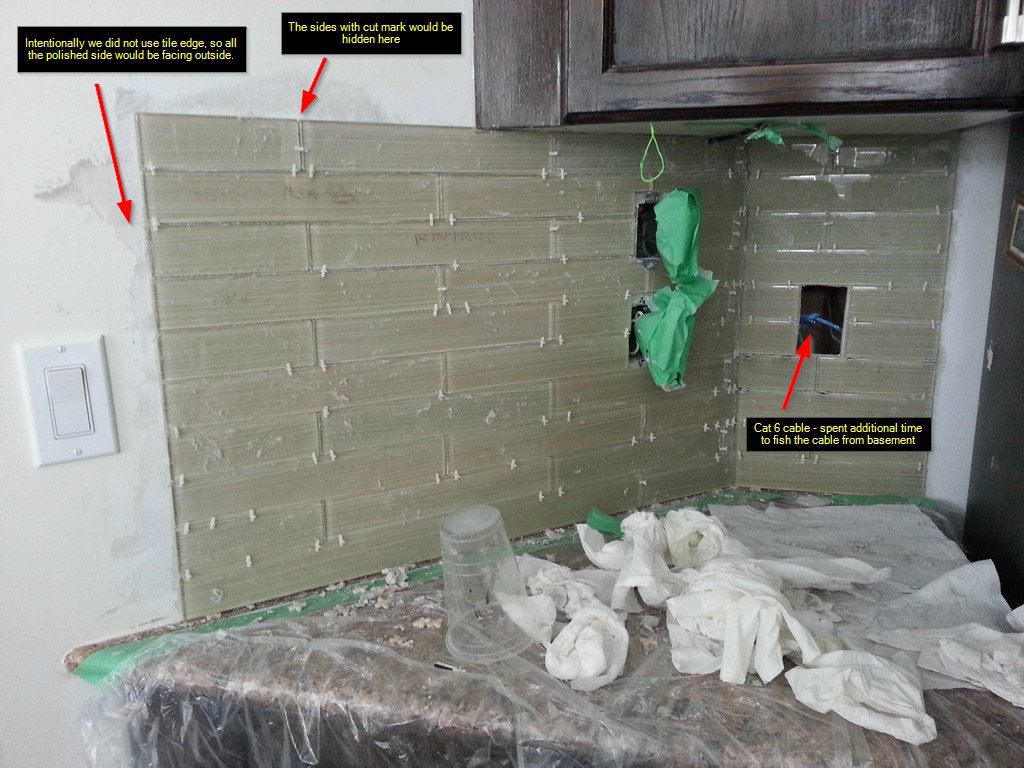
- Vertical and Horizontal lines: The most annoying part is how to align and level the tiles perfectly, there are many potential problems. Firstly, the tiles have defects, not all tiles are having the exact same size, believe it or not!!! It happened to ours because it’s Made in China. Secondly, the cutting of the tile is not perfect. By drawing the guidelines, it helps you to correct mistake before it’s too late.
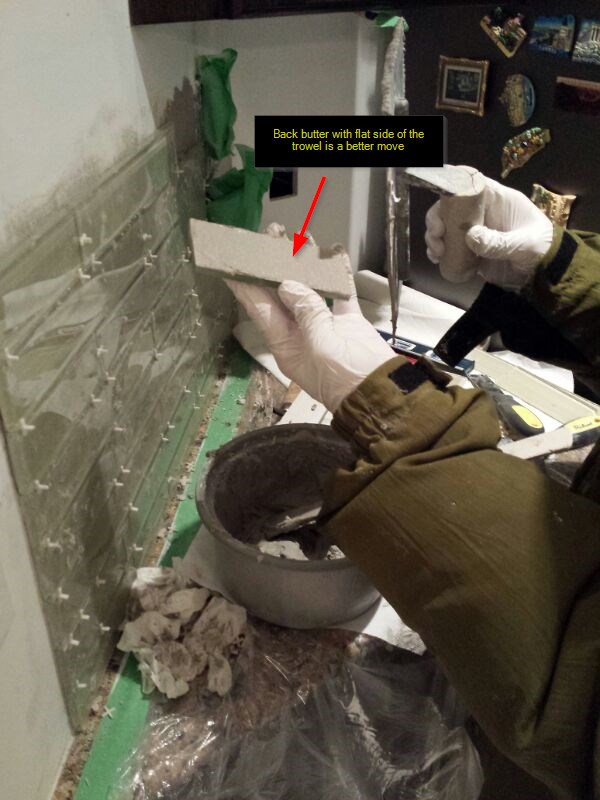
- Back butter or not? If you read this topic on the tiles forum, the answer is about 50/50. Half of the people say you don’t need to do it (some of those with 30-40 years trade experience really against it, saying it’s not necessary and waste of time). The other half say you do need to ensure close to 100% coverage. For me, I am scientific based – simply do an experiment with one back butter and one without, after they both dried completely and pry them out, tell me which one do you think has stronger bond – you decide it for yourself.
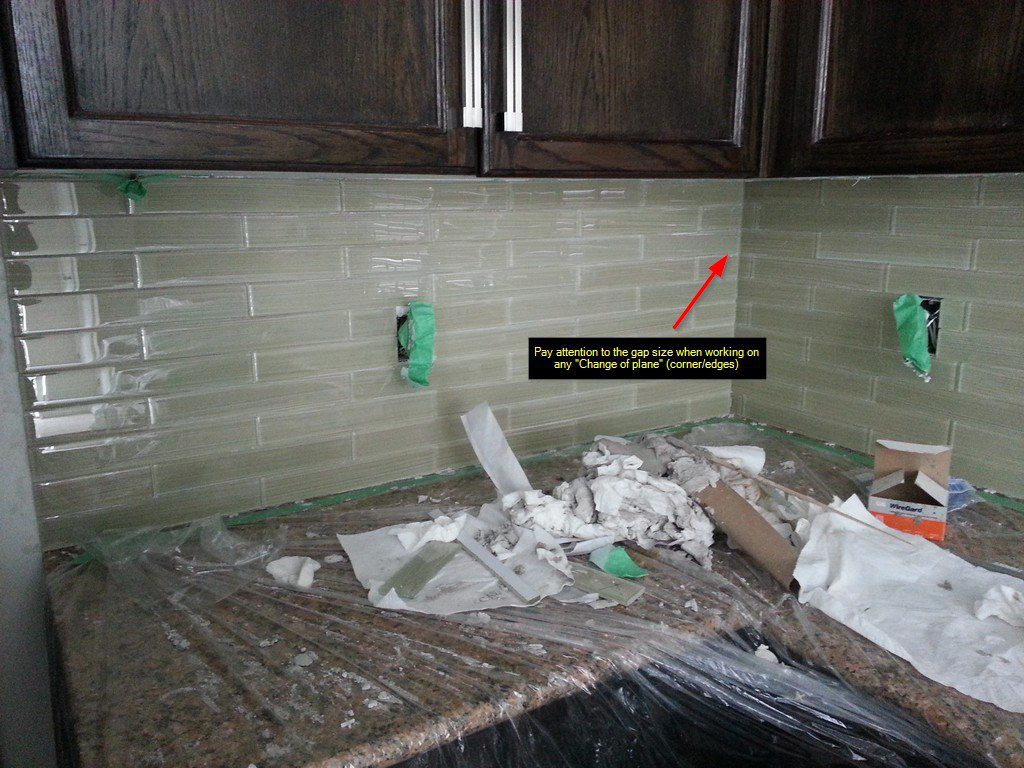
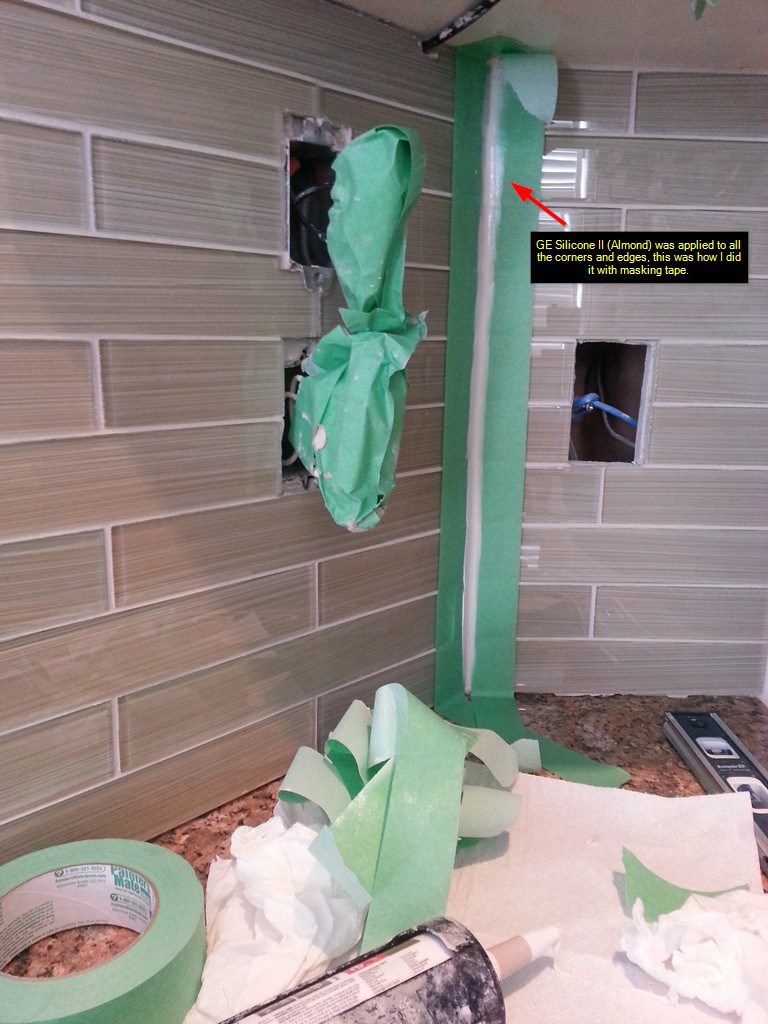
- Caulking vs Grout: There are tons of discussion on the forums on “change of plane” (edges/corners) to use caulking vs grout. I prefer to use caulking because it can hide imperfection or slight misalignment. Also, grout will crack on these particular areas. Use masking tape to make the perfect caulk lines, see photos for details.
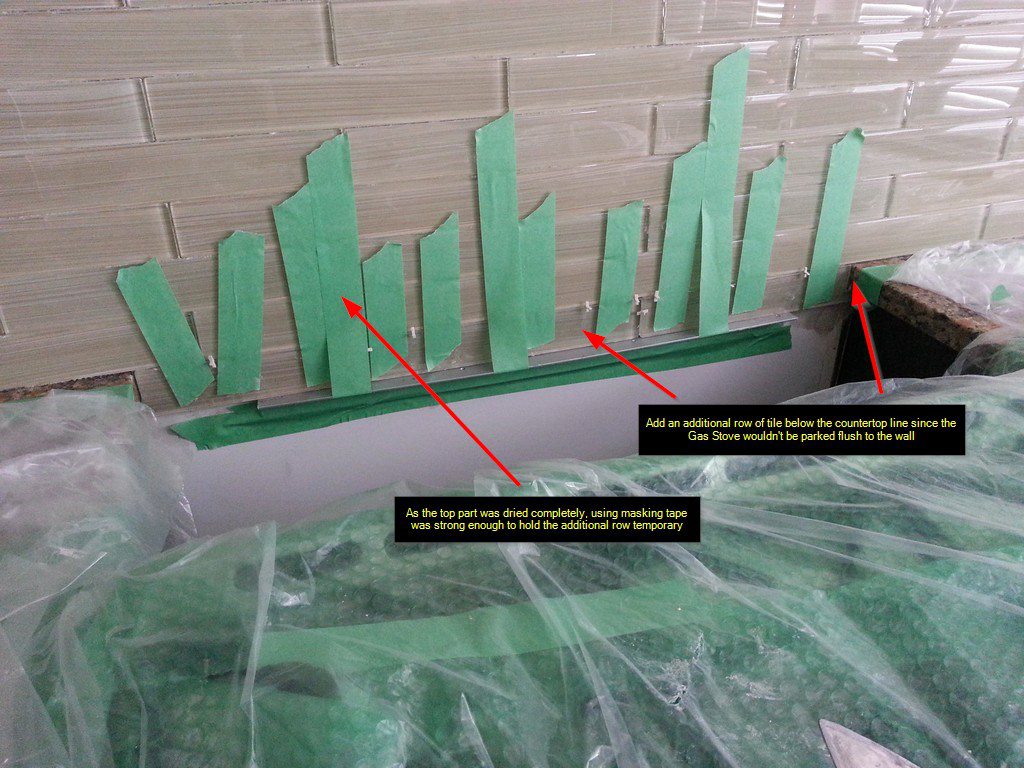
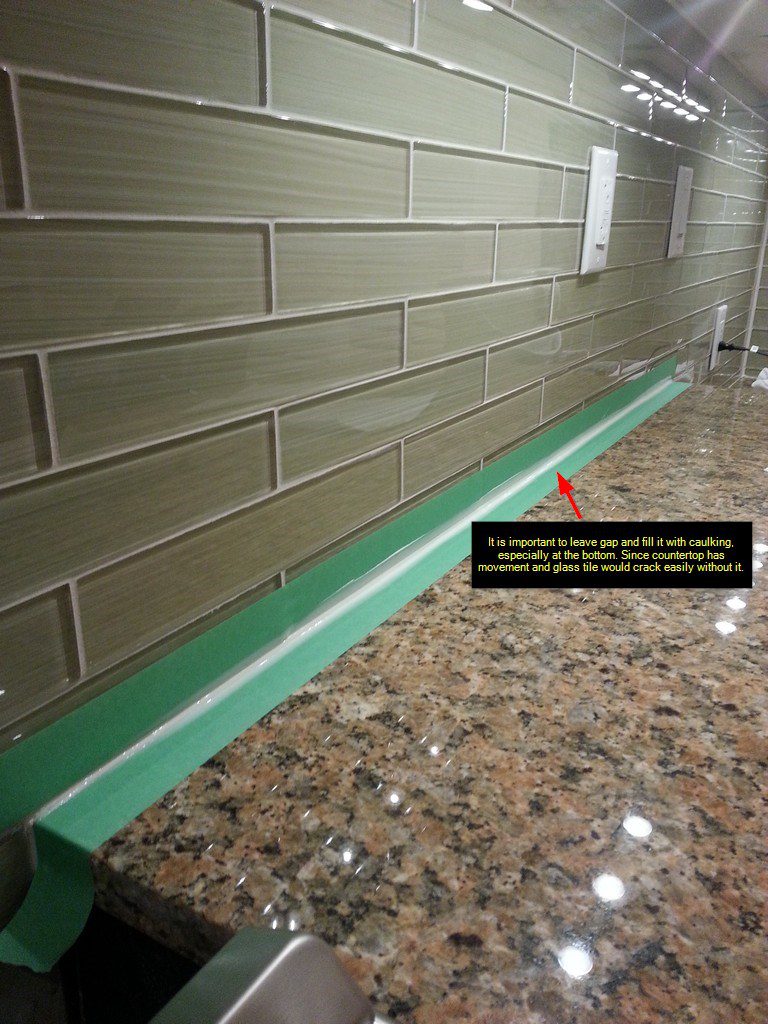
- Sitting tiles on counter top vs leaving a gap: It is a MUST to leave a single grout line space at the bottom and that joint should be finished with caulk, not grout. The reason is that counter top will have slight movement, especially for glass tile, they will crack. Thinset/glue is the one holding the tiles structurally on the wall, not the counter top non the grout.
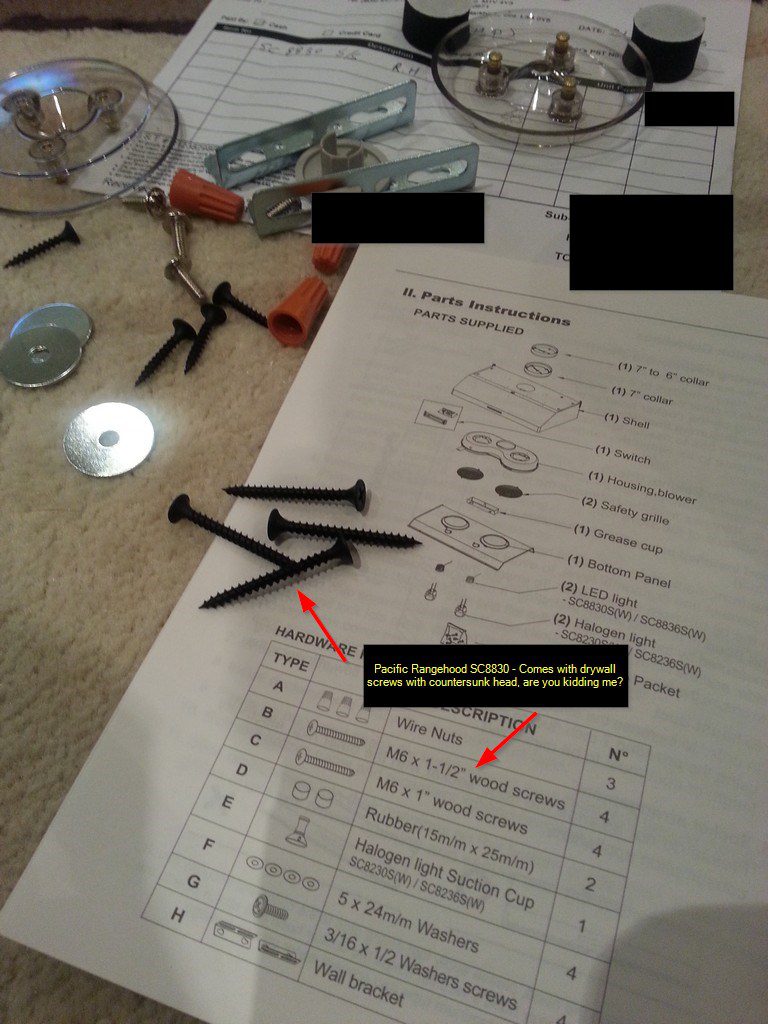
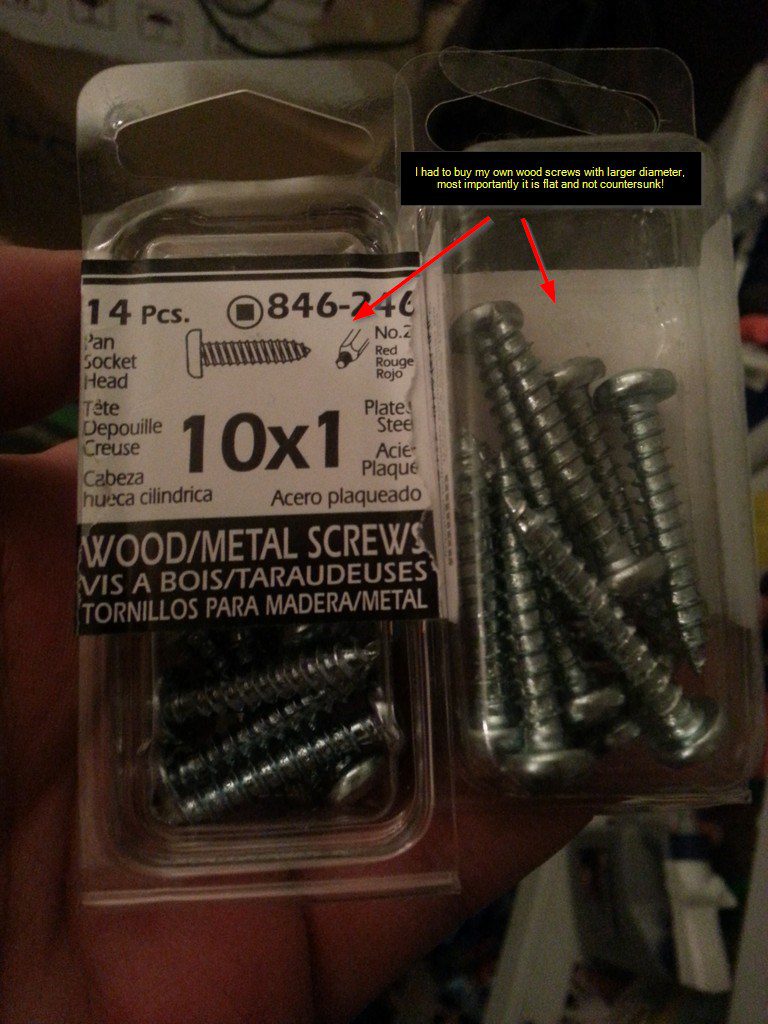
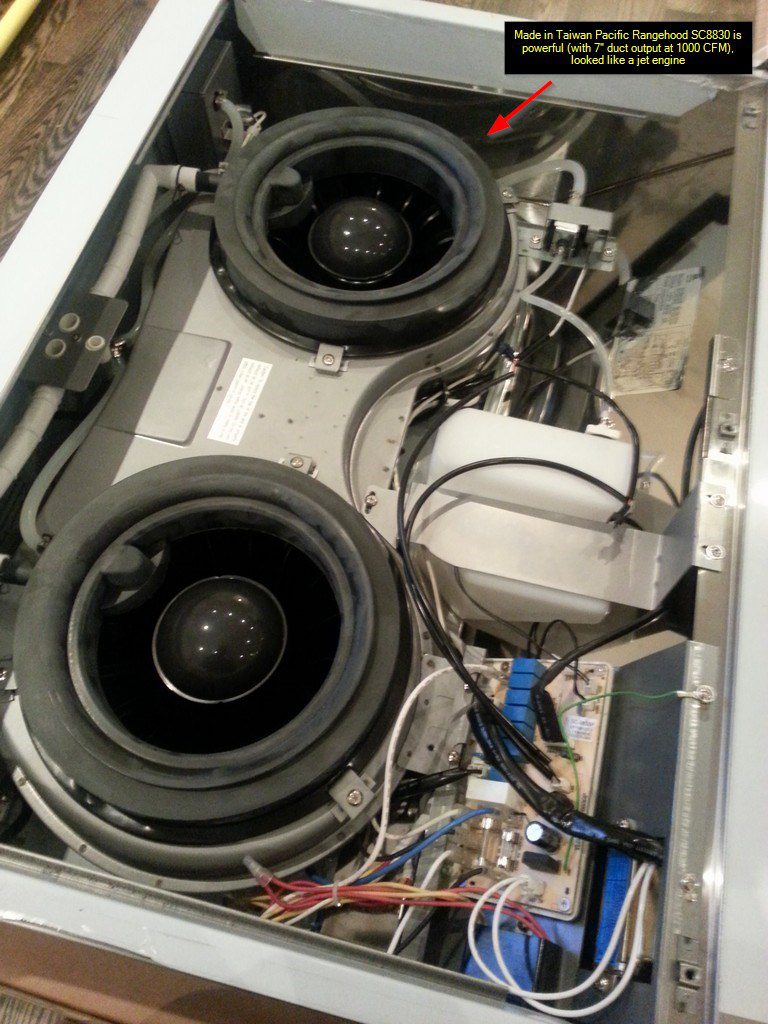
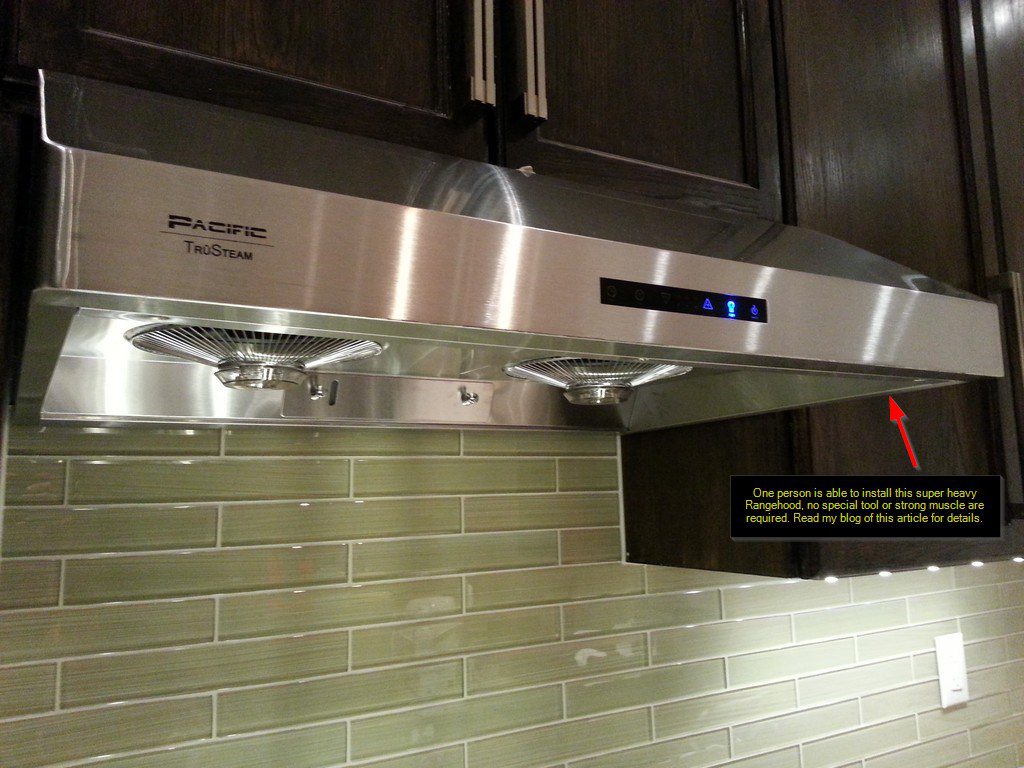
- Pacific Rangehood SC8830 review – Made in Taiwan Rangehood with 1000 CFM (7″ duct) is really powerful. Honestly speaking, I don’t really freaking care about “True Steam” or “False Steam”. But what bugged me was that, they came with drywall screws instead of wood screws (see photos, it didn’t match the manual). What is the problem? Firstly, drywall screws are having very low shear strength and they break into pieces easily. Secondly, it’s countersunk – how does it fit with the washers!! Now, I am not sure if I have faith in this Pacific product, seriously.
- Rangehood 1-person installation: The Pacific rangehood is very heavy, I could only lift it up in the air for less than 10 seconds. The trick is to put the screws half way into the wood, then slide the Rangehood in place, let it temporary hang the Rangehood there. Unscrew each screw one-by-one and add the washer to secure them. With the tight space, flexible shaft bit extension is your friend.
Materials and Total cost:
For tiles/thinset/grout were around $900 CAD, Rangehood was around $800 CAD and LED lights was around $300 CAD. Total cost for the whole project we spent was around $2000 CAD. Since it is DIY, labour is zero.
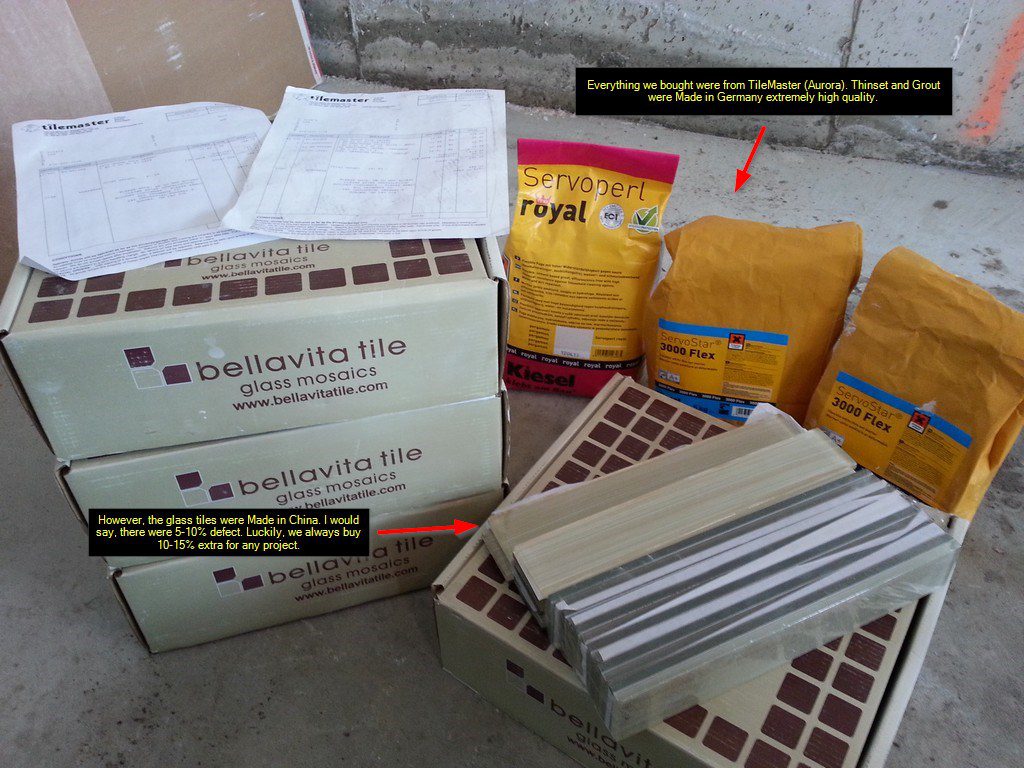
- Glass tile bellavita (Quality is okay, 10% defect. Made in China crap)
- Kiesel ServoStar 3000 Flex thinset (Made in Germany – high quality thinset)
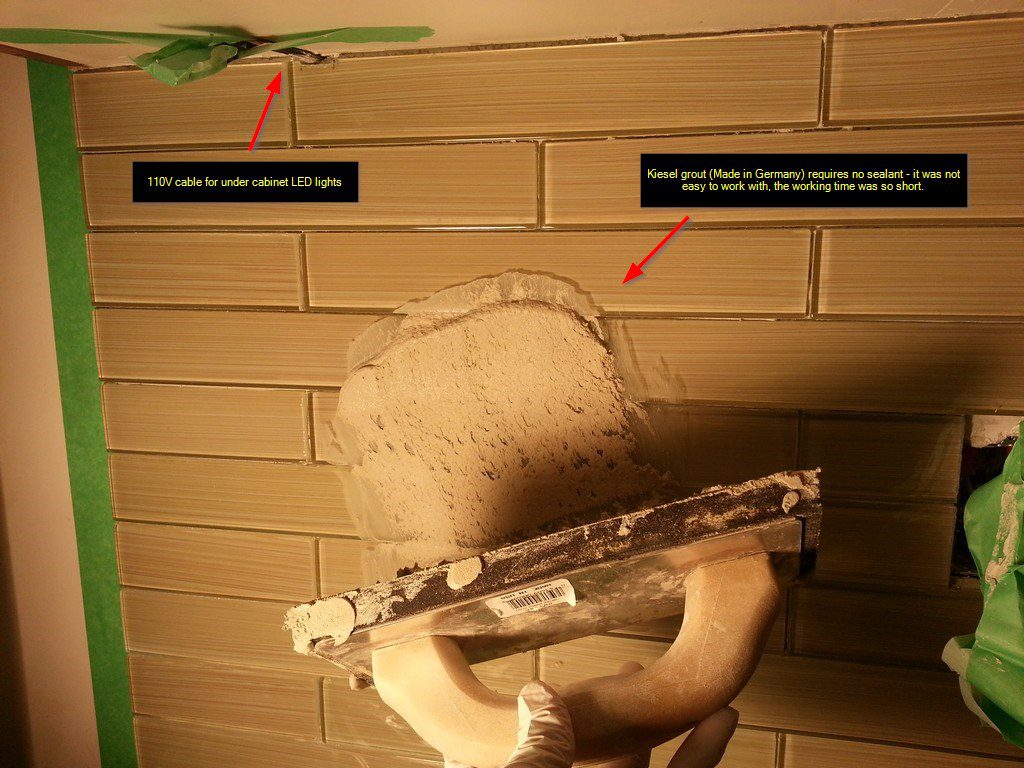
- Kiesel Servoperl grout (Made in Germany – warning: working time is very short)
- Pacific Range Hood SC-8830 – (Made in Taiwan, 1000 CFM, 7″ duct but comes with drywall screws with countersunk instead of flat wood screws!? WTF!)
- Utilitech Plug-In Cabinet LED Light Bar Kit (Lowes Canada item# 366089 + 366083)
Conclusion and Verdict
- Overall Difficulty: 3/5
- Most Challenge: Tiles/grout lines are perfectly level vertically and horizontally
- Most Annoying: The dust generated by tile demolition and working with messy thinset
- Time Taken: 2 months – I have a full time job (one person, only work on weekends and limited statutory holidays)